I was hunched over my tiny kitchen table last Tuesday, trying to fix a loose cabinet hinge with nothing but a screwdriver and a prayer, when I realized I was officially done. My “workspace” was a pile of mail, a half-empty coffee mug, and zero stability, making every little DIY task feel like a high-stakes crisis. If you’ve ever felt like you’re fighting your own environment just to get one simple thing done, you need to learn how to build a workbench that actually stays put. You don’t need a massive garage or a professional-grade workshop to stop the chaos; you just need a dedicated, sturdy surface that doesn’t wobble every time you apply a little pressure.
This guide isn’t about building some over-engineered masterpiece that requires a degree in carpentry. Instead, I’m breaking down a low-stress, budget-friendly approach to creating a functional station that fits your actual space. I’ll walk you through the essential tools, the smartest way to source cheap lumber, and the exact assembly steps to get you from a cluttered corner to a legit workspace without losing your mind (or your entire paycheck) in the process.
Guide Overview
Tools & Supplies
- Circular saw or miter saw for cutting lumber
- Power drill for driving screws
- Tape measure for accurate marking
- Speed square for ensuring 90-degree angles
- Level to ensure a flat work surface
- 4×4 lumber (for legs) 2 pieces
- 2×4 lumber (for frame and bracing) 6 pieces
- 3/4 inch plywood (for tabletop) 1 sheet
- 2.5 inch wood screws (for assembly) 1 box
- Wood glue (for joint stability) 1 bottle
Step-by-Step Instructions
- 1. First things first, you need to grab some lumber. Don’t go overboard with the fancy hardwoods unless you have a massive budget; for a starter bench, a mix of standard 2x4s and a thick piece of plywood is your best friend. I usually hit up the local hardware store and grab everything in one go so I’m not making three different trips because I forgot a single screw.
- 2. Once you’ve got your wood, it’s time to break it down. You’ll want to cut your 2x4s into lengths for your legs and your frame. If you don’t own a power saw, don’t panic—most big-box hardware stores will actually make the initial cuts for you if you bring in your measurements. Just make sure you double-check your math twice before they hit the trigger.
- 3. Now, let’s build the frame. You’re basically creating a big rectangular box out of your 2x4s that will act as the skeleton of your bench. Use a drill to drive in some wood screws, and honestly, pre-drilling your holes is a total lifesaver here to prevent the wood from splitting and to keep your hands from getting too cramped.
- 4. Attach the legs to your frame. This is where the workbench actually starts to feel real. I like to make sure the legs are perfectly square with the corners so the whole thing doesn’t end up wobbling like a broken table. If you’re feeling extra stable, add some diagonal bracing across the back or sides to keep it from swaying when you’re working.
- 5. Time for the tabletop. Lay your plywood sheet over the top of your frame. You want it to have a bit of an overhang on the sides, which actually makes it way easier to clamp things down to the edge when you’re working on a project. Secure it with screws, but make sure they’re countersunk so the heads sit flush with the wood—the last thing you want is a screw head catching on your sleeve later.
- 6. Give it a quick once-over with some sandpaper. You don’t need a professional finish, but you definitely want to smooth out the rough edges and any splinters. There is nothing worse than starting a DIY project only to end up with a literal splinter in your thumb five minutes in.
- 7. Finally, set it up in its new home and organize your gear. Since I’m big on maximizing small spaces, I usually screw a few small bins or a pegboard to the side of the bench. It’s all about creating a dedicated zone so you aren’t hunting for a screwdriver for twenty minutes every time you actually want to get something done.
Smart Lumber for Workbench Projects Without the Stress
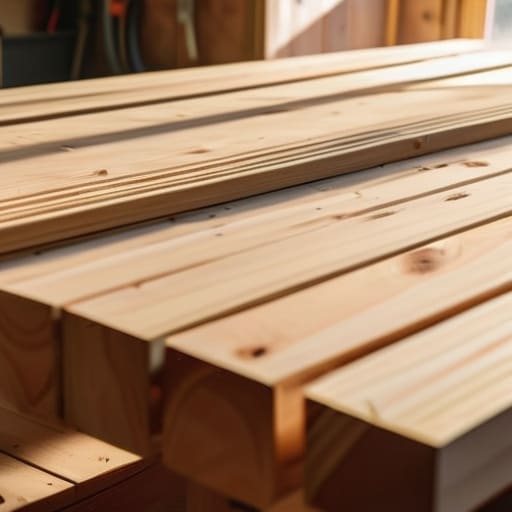
Look, I know the hardware store can feel like a sensory overload nightmare, especially if you’re just trying to grab some basic lumber for workbench projects without getting lost in the aisles. My biggest piece of advice? Don’t go overboard trying to find the most expensive, exotic hardwoods. Unless you’re building a museum piece, you really just need something dense and reliable. I usually swear by construction-grade pine or Douglas fir; they’re affordable, easy to find, and more than capable of handling the weight of your gear.
The real trick to a heavy duty workbench design isn’t actually the type of wood you buy, but how you select the pieces. Before you even get to the workbench assembly steps, run your hands along the boards. If they’re bowed, twisted, or look like they’ve been through a war zone, put them back. You want the straightest, cleanest cuts you can find so you aren’t fighting the material later. It’s a small bit of extra effort at the store that saves you massive amounts of frustration once you’re actually home trying to get things level.
Heavy Duty Workbench Design for Real Sanity
Look, if you’re planning on doing more than just assembling IKEA flatpacks, you need to stop thinking about a “table” and start thinking about a foundation. A flimsy surface is the fastest way to kill your motivation. When I was first starting out in my tiny apartment, I tried to use a folding card table for DIY projects, and let me tell you, it was a disaster waiting to happen. For a true heavy duty workbench design, you want to focus on mass and stability. I’m talking about adding weight—whether that’s through thicker legs or a double-layered top—so the whole thing doesn’t dance across the floor every time you hit a nail.
If you want to skip the trial and error, I highly recommend looking into some solid woodworking workbench plans that prioritize a wide stance. A narrower base might save floor space, but a wider, braced frame is what actually provides that rock-solid stability you need when you’re sawing or sanding. Don’t be afraid to overbuild it slightly; it’s much easier to live with a slightly chunky bench than it is to deal with a wobbling mess that makes every project feel twice as hard.
Three Ways to Stop Your Workbench From Becoming a Total Mess
- Don’t skip the bottom shelf. I know, it feels like extra work, but having a heavy-duty lower tier for your power tools and bulkier gear keeps the top surface clear for actual projects instead of just being a graveyard for half-finished stuff.
- Measure your height before you screw anything together. There is nothing worse than building a sturdy bench only to realize you’re hunched over like a gargoyle every time you try to work; aim for a height that lets your elbows rest comfortably at a 90-degree angle.
- Invest in a decent clamp system or a built-in vise early on. You can have the most beautiful workbench in the world, but if you’re struggling to hold a piece of wood steady with one hand while trying to saw with the other, you’re just asking for a crisis.
The TL;DR for Your New Workspace
Don’t overthink the materials; just grab sturdy, budget-friendly lumber and focus on a design that’s heavy enough to stay still when you’re actually working.
Prioritize a stable, clutter-free surface over fancy aesthetics—a workbench is a tool, not a showroom piece, so make sure it actually serves your workflow.
The Finish Line
At the end of the day, building a workbench isn’t about having a Pinterest-perfect workshop or a massive garage; it’s about creating a dedicated space where you can actually function. We covered everything from picking smart, budget-friendly lumber to choosing a heavy-duty design that won’t wobble the second you lean on it. By focusing on stability and organization rather than just aesthetics, you’ve turned a chaotic corner of your home into a legitimate zone of productivity. You’ve done the hard part of the planning and the heavy lifting, so don’t let the momentum die now.
Remember, your first build doesn’t have to be a masterpiece to be useful. It’s okay if the edges aren’t perfectly sanded or if it looks a little “lived-in”—that’s just proof that it’s actually being used for something real. The goal was to stop the constant crisis management of working on a cramped kitchen table, and you actually did it. Now, grab your tools, clear the sawdust, and enjoy the feeling of finally having a workspace that works as hard as you do.
Frequently Asked Questions
Do I really need a power drill for this, or can I get away with a basic screwdriver and some elbow grease?
Look, I get it—the thought of dropping $100 on a drill when you’re just trying to build one thing feels like a scam. You can technically do this with a manual screwdriver and a lot of patience, but honestly? Your wrists will hate you by screw number twenty. If you can borrow one from a neighbor or hit up a tool library, do it. It turns a three-hour headache into a thirty-minute win.
How do I stop my new workbench from wobbling every time I actually try to use it?
Ugh, the dreaded wobble. There is nothing more soul-crushing than finally setting up your space only to have your project dance across the room every time you hammer something. First, check your floor—if you’re on carpet, you’re fighting a losing battle; get some leveling feet. If the floor is fine, it’s likely your joints. Tighten every bolt, add some wood glue to your connections, and maybe add a cross-brace. Stability is everything.

