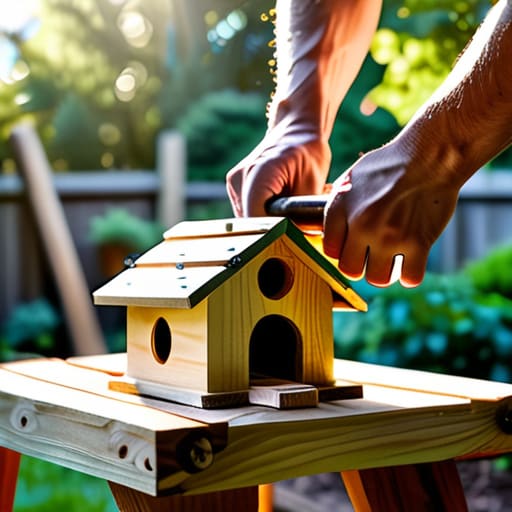
I was standing in the middle of my living room, surrounded by expensive cedar planks and a pile of sawdust that looked more like a crime scene than a hobby, wondering why I’d ever thought I could actually master how to build a birdhouse without a professional workshop. I had spent way too much money on “beginner kits” that were basically just overpriced puzzles, and my first attempt ended up looking less like a sanctuary for birds and more like a shoddily constructed shed for squirrels. It’s one of those DIY projects that people make sound way more intimidating than it actually needs to be, but honestly? Most of the complicated tutorials out there are just setting you up for a headache.
In this guide, I’m stripping away all the unnecessary fluff and the “expert” jargon that makes you feel like you need a degree in carpentry just to hang something in your yard. I’m going to show you the exact, low-stress way to get this done using just a few basic tools and some dead-simple logic. We’re going to focus on a design that actually works for the birds and won’t leave you feeling like you’ve wasted your entire Saturday—because we’re here to build things, not to manage a crisis.
Guide Overview
Tools & Supplies
- Handsaw or miter saw for cutting wood
- Hammer for assembling pieces
- Drill with bits for entrance hole and pilot holes
- Measuring tape for accuracy
- Cedar or pine board (1" x 6" x 4')
- Galvanized nails (small box)
- Exterior wood glue (small bottle)
- Sandpaper (medium grit)
Step-by-Step Instructions
- 1. First things first, we need to grab our materials. You don’t need a professional workshop for this, just a single piece of cedar or pine (cedar is great because it’s naturally weather-resistant) and some exterior-grade screws. Grab a drill, a saw, and a measuring tape. I always keep my multi-tool handy for the quick stuff, but for the actual construction, you’ll definitely want a real screwdriver so you don’t strip the heads and end up frustrated.
- 2. Now, let’s get into the measuring phase. Grab your tape measure and mark out your pieces: a floor, four walls, and a roof. Pro tip: make sure the roof has a slight overhang so the rain doesn’t just soak the entrance. If you’re feeling a little extra, you can use a stencil to make sure your lines are straight, but honestly, as long as it’s relatively square, the birds won’t care about your perfectionism.
- 3. Time to do the heavy lifting—the cutting. Using your saw, carefully follow those lines you just drew. If you’re using a hand saw, take your time and don’t try to rush through it; steady breaths are your best friend here. If you’re using a power saw, just make sure you’ve got a clear workspace so you aren’t tripping over clutter while you work.
- 4. Next up is the entrance hole. This is the most important part because it dictates which “tenant” moves in. Use a spade bit on your drill to create a hole in the front panel. Depending on what birds you want in your yard, you’ll want a hole that’s about 1 to 1.5 inches wide. If you make it too big, you might end up with some unwanted neighbors like aggressive starlings.
- 5. Let’s start assembling. Take your floor and attach the walls using your screws. I highly recommend pre-drilling small pilot holes before you drive the screws in; this prevents the wood from splitting, which is a total rookie mistake that I definitely made during my first DIY attempt. Once the walls are secure, attach the roof last.
- 6. Before we hang this thing up, let’s add a little bit of “functional aesthetic.” You don’t need to paint it with bright neon colors (most birds actually prefer natural tones), but you can sand down any rough edges so nobody gets a splinter. If you want to get fancy, you can add a small perch, but honestly, most birds don’t even need one to get inside.
- 7. Finally, find the perfect spot to mount your masterpiece. You want somewhere that’s stable, maybe about 5 to 10 feet off the ground, and away from heavy foot traffic. Use a couple of sturdy screws to attach it to a post or a tree. Once it’s up, just sit back with a coffee and wait for your new tiny neighbors to move in.
Choosing the Best Wood for Birdhouses Without the Stress
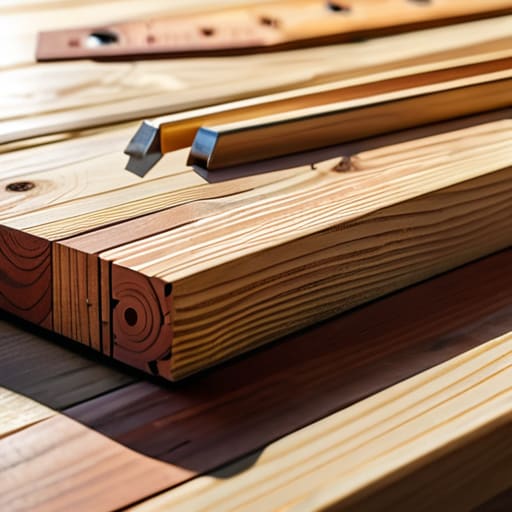
When you’re standing in the lumber aisle, looking at a sea of planks, it’s easy to feel a little overwhelmed. You don’t need anything fancy or expensive, but you do need something that won’t rot the second it gets hit by a summer thunderstorm. If you ask me, the big debate is usually cedar vs pine for birdhouses. Pine is super budget-friendly and easy to work with, but it tends to degrade faster if you don’t seal it (though, pro tip: don’t seal the inside, or you’ll mess with the birds’ natural environment). Cedar, on the other hand, is the MVP of durability because it handles moisture like a champ without much extra help.
If you’re on a tight budget, don’t sweat it—just pick something untreated. Whatever you do, avoid anything pressure-treated with harsh chemicals, because we want to keep our feathered neighbors safe, not accidentally poison them. Once you’ve picked your wood, you don’t need a massive workshop full of heavy-duty woodworking tools for birdhouses to get started. A simple hand saw and some basic sandpaper are honestly all you need to make this project feel less like a construction site and more like a chill weekend win.
Essential Woodworking Tools for Birdhouses That Save Your Sanity
Look, we aren’t trying to build a cathedral here; we’re just making a cozy home for some feathered neighbors. You don’t need a professional workshop to get this done, but you do need a few reliable woodworking tools for birdhouses so you aren’t fighting your materials the whole time. A decent hand saw or a miter saw is your best friend for getting those clean, straight lines, and a cordless drill is non-negotiable. Trust me, trying to hammer nails into stubborn wood without pre-drilling pilot holes is a one-way ticket to a splinter-filled headache and a cracked board.
I also highly recommend grabbing a few clamps and a good quality tape measure. If you’re trying to hit specific birdhouse dimensions for specific species, precision is everything—if the hole is too big, the wrong birds move in; if it’s too small, nobody can get in. Measure twice, cut once is a cliché for a reason, and in my experience, it’s the only way to avoid that mid-project “why is this piece too short?” meltdown. Keep it simple, keep it steady, and let’s get to the actual building.
Three Tiny Details That Actually Matter (Don't Skip These)
- Skip the fancy paint and heavy stains. Most birds are pretty picky about their real estate, and anything with a strong chemical scent or toxic fumes is an immediate “no” from them. Stick to natural wood or, if you absolutely must decorate, use a water-based, non-toxic finish on the outside only.
- Give them some ventilation and drainage, or you’re basically building a tiny sauna. Drill a few small holes near the top of the side walls for airflow and a couple of tiny ones in the floor so any rain that gets in doesn’t turn their home into a swamp.
- Keep the entrance hole size specific to the birds you actually want to hang out with you. A hole that’s too big is an open invitation for predators or aggressive species to move in and kick the locals out. Do a quick Google search for your local bird types before you start drilling so you don’t accidentally build a house for the wrong crowd.
The TL;DR Version
Keep it simple and functional—you don’t need a professional workshop to do this, just the right wood and a few basic tools to get the job done without the headache.
Focus on the birds’ needs over perfection; as long as the house is sturdy and well-placed, you’ve officially crushed the “adulting” goal of creating something useful.
The Final Piece of the Puzzle
Honestly, once you’ve picked out your wood and gathered your tools, the hardest part is actually just starting. We’ve covered everything from selecting the right cedar to making sure your tool kit doesn’t become a cluttered mess in your junk drawer. Just remember that you don’t need a professional workshop to do this; you just need a little bit of patience and the right approach. As long as you’ve followed these steps, you’ve successfully navigated the most stressful parts of the build and are ready to hang it up in your yard.
At the end of the day, this birdhouse doesn’t have to be a museum-quality masterpiece. If it’s a little crooked or the finish isn’t perfectly smooth, it’s okay. The whole point of DIYing is to reclaim a bit of your time and prove to yourself that you can actually make things with your own two hands. So, grab that multi-tool, head outside, and enjoy the small win of seeing a bird actually move into your creation. You’ve totally got this.
Frequently Asked Questions
Do I really need to paint or stain the birdhouse, or will that mess with the birds?
Honestly, keep it natural. I’m all for making things look aesthetic, but we don’t want to accidentally turn this into a toxic habitat. If you must decorate, stick to raw wood or use a water-based, non-toxic sealer on the outside only. Never paint the inside; birds need that natural texture for grip, and you don’t want them inhaling fumes. When in doubt, let the wood age naturally—it’s low maintenance and much safer.
How do I know if I've built it too small for the specific birds in my neighborhood?
Honestly, this is such a valid fear because nobody wants to build a luxury condo that ends up being a deathtrap for a tiny chickadee. If you’re worried, check your entrance hole size first—that’s the real gatekeeper. Most common backyard birds need a hole between 1 and 1.5 inches. If it looks like a massive cavern, it’s probably too big. When in doubt, Google your local birds and match their specific hole requirements.

