I was halfway through moving a heavy vintage mirror into my apartment last Tuesday when I heard that dreaded, hollow thud—the sound of my drywall meeting a sharp corner. I stood there staring at the jagged crater, feeling that immediate, sinking sensation that my weekend was officially ruined and I’d have to call an expensive handyman. But here’s the thing: you don’t actually need a contractor or a degree in construction to fix this. Learning how to patch a hole in the wall is one of those “adulting” milestones that feels intimidating until you realize it’s mostly just playing with some putty and a little bit of patience.
I’m not going to give you a lecture on structural integrity or suggest you buy a whole workshop of power tools. Instead, I’m sharing the low-stress, budget-friendly method I’ve perfected over years of living in small spaces and making my own mistakes. We’re going to walk through exactly what you need, how to avoid that messy “sandpaper cloud” in your living room, and how to make the patch look so seamless that even you won’t notice it’s there. Let’s get this done so you can stop staring at that dent and get back to your life.
Guide Overview
Tools & Supplies
- Putty knife for applying compound
- Sandpaper (fine grit) for smoothing surfaces
- Spackle knife for small repairs
- Sponge for cleaning dust
- Spackle or joint compound (small tub)
- Patch kit or mesh adhesive bandage (1-2 pieces)
- Wall primer (small can)
- Matching wall paint (small container)
Step-by-Step Instructions
- 1. First things first, you need to assess the damage. If it’s just a tiny little dent from a door handle or a stray screw, you can skip the heavy lifting. But if it’s a proper hole, you’ll want to grab some mesh adhesive patch from the hardware store. Use a utility knife to trim away any loose, peeling bits of drywall or wallpaper around the edges; if the edges are jagged, the patch won’t sit actually flat.
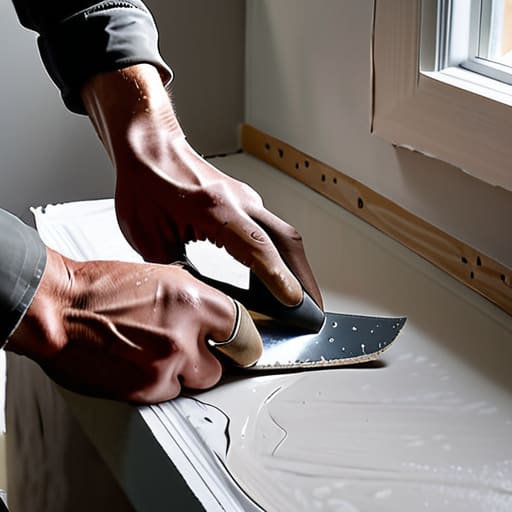
- 2. Next, we’re going in with the spackle. Take your putty knife—and no, a kitchen spatula won’t cut it here—and spread a layer of lightweight spackle over the patch. The goal isn’t to make it perfect on the first pass, but to fill the gaps completely. Try to feather the edges outward so the buildup gets thinner as it moves away from the hole, which makes your life way easier later.
- 3. Now comes the part that requires a little bit of patience: the drying phase. You can’t rush perfection, and trying to sand wet spackle is a one-way ticket to a mess. Let it dry completely according to the tub’s instructions—usually a couple of hours, but if you’re in a rush, some brands have a “fast-dry” version that’s a total lifesaver.
- 4. Once it’s bone-dry, grab a sanding sponge and start smoothing things out. You’re looking for a surface that feels as seamless as possible under your fingertips. If you can still feel a bump or a ridge, don’t panic; just apply a second, much thinner layer of spackle and let it dry again. It’s much better to do two thin layers than one thick, clumpy one.
- 5. After you’ve sanded it down until it’s smooth, you need to clean the area. Take a slightly damp microfiber cloth and wipe away all that fine white dust. If you leave the dust there, your paint is going to look patchy and weird, and we are definitely not aiming for that “unfinished DIY” vibe.
- 6. Finally, it’s time for the victory lap: painting. If you have the original paint can hiding in a closet somewhere, you’re golden. If not, you might need to take a small flake of the dried paint to a hardware store for a color match. Use a small roller rather than a brush to avoid visible brush strokes, and dab the paint on lightly to ensure the texture matches the rest of your wall.
Quick Fixes Using a Drywall Patch Kit for Small Holes
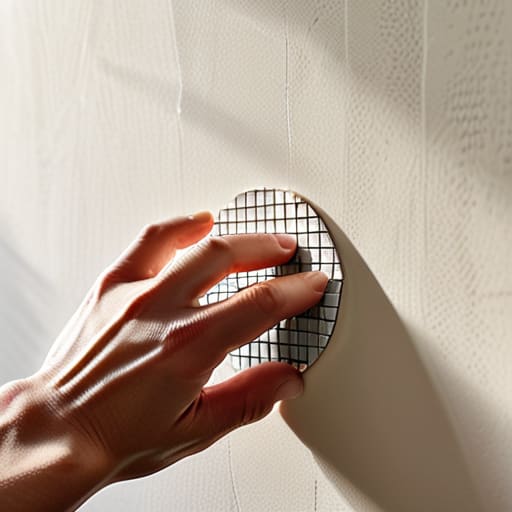
If you’re staring at a tiny puncture from a door handle or a rogue nail and feeling like you need a construction degree just to fix it, stop. Honestly, if the damage is smaller than a coin, don’t even bother with the heavy-duty stuff. Grab a drywall patch kit for small holes from your local hardware store—they’re basically the “cheat code” of home repair. These kits usually come with a self-adhesive mesh patch that sticks right over the gap, which saves you from the nightmare of trying to keep a piece of loose tape aligned while you’re working.
Once the patch is stuck, you’ll just need to focus on your spackling compound application. The trick here is to work in thin, translucent layers rather than trying to glob it all on at once. If you go too thick, you’ll end up spending an eternity trying to sand drywall smooth later, and nobody has time for that. Just keep it light, let it dry, and you’ll have that wall looking seamless before your next coffee break.
Mastering Spackling Compound Application Without the Mess
Here is the secret to not ending up with a face full of white dust: it’s all about the angle of your putty knife. When you’re working on your spackling compound application, don’t just glob it on like you’re frosting a cake. Hold the knife at about a 45-degree angle and use long, sweeping motions to spread the compound outward from the center of the hole. You want to aim for a feathered edge—basically, making the edges of the patch so thin that they blend seamlessly into the rest of the wall. If you leave a thick ridge, you’re just going to spend an eternity sanding later.
Also, please, for the love of my sanity, resist the urge to overwork the material. If you keep dragging the knife back and forth over the same spot, you’re just going to pull the compound right back out of the hole. Apply it, smooth it once, and walk away. If it shrinks a little as it dries (and it probably will), just add another thin layer. It’s much easier to fix a small dip than it is to sand down a massive, crusty mountain of dried spackle.
Pro Tips to Keep Your Walls (and Your Sanity) Intact
- Don’t go overboard with the spackle. It’s tempting to glob it on like you’re frosting a cake, but less is actually more here. Aim for thin, even layers; you can always add more, but trying to sand down a massive mountain of dried compound is a one-way ticket to a messy afternoon.
- Sanding is where most people lose their cool (and their lungs). Grab a cheap sanding sponge rather than just loose sandpaper—it gives you way more control and helps you avoid those annoying swirl marks that show up once you try to paint. Also, seriously, wear a mask or open a window; that fine dust gets everywhere.
- The “Light Test” is your best friend. Once you think you’re done, grab a flashlight or your phone and shine it sideways across the patch. This creates shadows that reveal any tiny bumps or divots you missed. If it looks smooth under the side-light, you’re actually ready for primer.
The TL;DR for a Flawless Finish
Don’t rush the drying process; applying multiple thin layers of spackle is way more effective (and less of a headache) than trying to glob it all on at once.
Invest in a decent sanding block—it’s the difference between a patch that looks like a bump and one that actually disappears into your wall.
You've Got This
So, there you have it. Whether you went the route of a quick-fix patch kit for those tiny accidental dents or you actually leveled up your skills by mastering the art of the smooth spackle application, you’ve officially conquered the hole in your wall. Just remember that the secret to a seamless finish isn’t some professional magic—it’s really just about patience and light pressure during the sanding phase. Don’t rush the drying time, keep your tools clean, and you’ll end up with a surface that looks like nothing ever happened.
At the end of the day, fixing a wall is about way more than just aesthetics; it’s about taking control of your space. We spend so much time feeling overwhelmed by the little things that pile up, but seeing a visible result from a bit of DIY effort is such a massive win for your sanity. You don’t need a contractor on speed dial to maintain a home you love. You just need a little grit, a bit of spackle, and the realization that you are more than capable of handling the small stuff.
Frequently Asked Questions
How do I know if the hole is too big for a simple spackle fix and actually needs a full piece of drywall?
Here’s the rule of thumb: if you can see through the hole or if it’s bigger than a nickel, we’re moving past the “quick fix” stage. If you can stick your finger through it or if the surrounding drywall feels soft and crumbly, spackle won’t save you—it’ll just turn into a messy, cracked disaster later. At that point, it’s time to stop playing around and actually cut out a fresh piece of drywall.
Once the patch is dry, how do I sand it down so it's actually invisible and doesn't leave a weird bump under the paint?
The “bump” is the enemy of a clean finish. Once it’s bone dry, grab a fine-grit sanding sponge—don’t go too heavy or you’ll sand right through the patch. Use light, circular motions, feeling the wall with your fingertips like you’re checking for a fever. If you feel a ridge, keep going. The goal is for the transition to feel seamless under your hand. Once it’s smooth, wipe the dust away so your paint actually sticks.

