I was sitting on my floor last Tuesday, wrapped in three different blankets and nursing a lukewarm coffee, wondering why my apartment felt more like a walk-in freezer than a living space. It turns out, I wasn’t actually cold—I was just losing a battle against a tiny, invisible enemy. Most people think you need a professional contractor or a massive renovation budget to fix a drafty entrance, but the truth is that weatherstripping a door is a low-stakes, ten-minute project that most of us just ignore until we’re shivering.
I’m not here to sell you on some complicated, expensive home improvement overhaul that requires a toolbelt you don’t own. Instead, I’m going to walk you through the exact, no-nonsense way to seal those gaps so you can finally stop paying to heat the entire neighborhood. We’ll cover how to pick the right materials, how to prep the surface so the adhesive actually sticks, and how to get it done without making a total mess of your entryway.
Guide Overview
Tools & Supplies
- Measuring tape to determine door and frame dimensions
- Utility knife to trim excess material
- Screwdriver to secure door sweeps or strike plates
- Vacuum or cloth to clean the door surface
- Weatherstripping roll (foam, rubber, or V-strip) 1 roll
- Door sweep 1 unit
- Adhesive or screws (usually included with weatherstripping) 1 pack
Step-by-Step Instructions
- 1. First things first, you need to do a little detective work to see where the air is actually escaping. Grab a flashlight and a candle (or even just a lighter if you’re feeling brave) and move it slowly around the edges of the door frame on a windy day. If the flame flickers like crazy, you’ve officially found your culprit. This helps you decide if you need the sticky foam strips, the more heavy-duty rubber gaskets, or if you need to tackle the gap at the very bottom with a door sweep.
- 2. Once you know where the leaks are, grab some isopropyl alcohol and a microfiber cloth to clean the surface. I know, I know, cleaning is the last thing you want to do on a Saturday, but if you apply new weatherstripping over layers of dust and old grime, it’s going to peel off within a week. You want that surface bone-dry and spotless so the adhesive actually does its job.
- 3. Measure your door frame like your life depends on it. Don’t just eyeball it—I’ve been there, and it’s a recipe for a messy, uneven look. Use a measuring tape to get the height and width of the jambs, and then measure the bottom gap separately. Writing these numbers down on a scrap of paper or your phone prevents that frantic “wait, how long was that again?” moment when you’re standing in the middle of the hardware aisle.
- 4. Now, peel the backing off your chosen weatherstripping, but don’t do the whole door at once. Start at the top corner and work your way down one side. Press the strip firmly against the frame, using your thumb to smooth out any air bubbles. If you’re using the adhesive foam kind, try to keep it as straight as possible; if it goes on crooked, it’s going to look super amateurish and won’t seal correctly.
- 5. If you’re dealing with that annoying gap at the bottom of the door, it’s time to install a door sweep. Most of these just screw right into the bottom of the door, but if you’re renting and terrified of making holes, look for the self-adhesive versions. Just make sure you align it so it sits flush against the threshold—if it’s too high, the door won’t close; if it’s too low, you’re still letting the cold in.
- 6. Once everything is stuck down, do the “light test” one more time. Close the door and look for any remaining slivers of light peeking through the edges. If you still see light, you might need to add an extra layer or adjust the positioning of your strips. It’s much easier to fix it now than to realize you’ve wasted twenty bucks and an hour of your life on a fix that didn’t actually work.
- 7. Finally, give the door a few firm closes and opens to make sure nothing is catching or rubbing weirdly. You want a seal that is snug but not a struggle. If you have to shoulder-charge your way into the room, you’ve gone a little too heavy on the stripping, so just trim a tiny bit off the ends until it feels smooth and effortless.
Foam vs Rubber Weatherstripping Choosing Your Sanity Saver
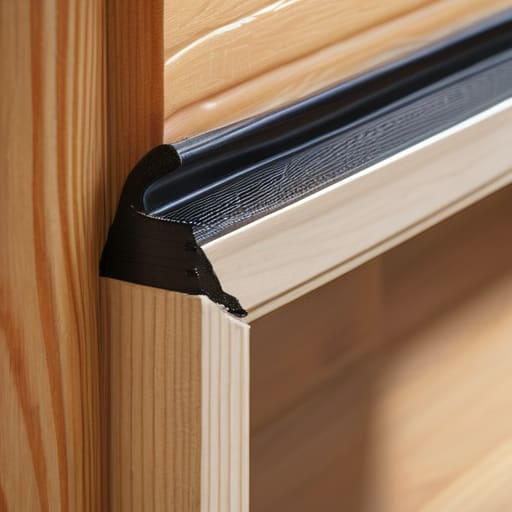
So, you’re standing in the hardware aisle staring at a wall of sticky strips, feeling that familiar “adulting paralysis” setting in. Don’t panic. The biggest debate you’re going to face is foam vs rubber weatherstripping, and honestly, the choice comes down to where exactly the air is trying to sneak in. Foam is super budget-friendly and easy to work with if you’re just filling small gaps in a door jamb, but let’s be real: it tends to crumble and lose its shape after a season or two. If you want something that actually lasts, I always recommend going with rubber. It’s a bit more of an investment, but it’s way better at preventing air leaks around doors long-term without turning into a sticky mess.
If you notice the draft is coming from the very bottom of the door rather than the sides, you’re probably looking at a door sweep replacement rather than just a strip of adhesive. This is where most people fail. A strip on the jamb won’t do much if there’s a massive gap between your door and the floor. Pairing a solid rubber seal on the sides with a proper sweep at the bottom is the ultimate way to tackle those energy efficient home improvements without needing a contractor or a massive budget.
Door Bottom Seal Installation for a Stress Free Home
If you’ve already tackled the sides and the top, you’re halfway there, but don’t ignore the gap at the bottom. This is usually where the real culprits live—the drafts that make your floor feel like a walk-in freezer. When it comes to door bottom seal installation, I always recommend checking if your current sweep is actually damaged or just poorly positioned. If it’s cracked or peeling, a simple door sweep replacement is going to be your best friend. It’s one of those low-effort, high-reward moves that makes a massive difference in how your space actually feels.
Pro tip: before you screw anything in, do the “light test.” Turn off the lights in your hallway and see if any light peeks through the bottom of the door. If you see it, you’re losing money. Aim for a seal that is tight enough to block the air but doesn’t require you to kick the door shut every single time you leave the room. It’s all about that sweet spot between total insulation and actually being able to move through your house without a fight.
Pro Tips to Save You from a DIY Disaster
- Clean your door frame like your life depends on it. I know, it sounds extra, but if you try to stick new weatherstripping onto a layer of old dust and grime, it’s going to peel off in three days and you’ll be right back where you started. Grab some rubbing alcohol and a rag first—your future, more stable self will thank you.
- Don’t go overboard with the thickness. It’s tempting to buy the beefiest, thickest seal you can find thinking “more is better,” but if you overdo it, you’ll end up fighting your own door just to close it. You want a snug seal, not a workout every time you want to leave your apartment.
- Test the “Light Leak” before you commit. Once you think you’re done, turn off the lights in your hallway and have someone stand on the other side with a flashlight. If you see light peeking through any gaps, that’s where the heat is escaping. Fix those specific spots before you call it a day.
The TL;DR on Saving Your Sanity (and Your Heating Bill)
Don’t overcomplicate it—pick the right material for the job (rubber for durability, foam for budget) and fix the draft before it turns into a massive utility bill.
Focus on the high-impact spots like the door bottom and the frame gaps; a few minutes of DIY now means way less “crisis management” when the temperature drops.
The Final Check
At the end of the day, weatherstripping isn’t just about saving a few bucks on your utility bill—though that’s definitely a win for your bank account. It’s about finally closing that gap between you and a house that actually feels secure and cozy. Whether you went with the budget-friendly foam or invested in the heavy-duty rubber, the goal was the same: stopping the chaos from creeping in through the cracks. Just make sure you’ve double-checked your door bottom seal, because that’s usually where the most annoying drafts hide. Once those seals are tight, you’ve officially conquered one more adulting task on your list.
I know that sometimes these tiny home maintenance projects feel like just one more thing on an already overflowing plate. But honestly? Taking twenty minutes to fix something yourself is a massive sanity saver. You aren’t just fixing a door; you’re reclaiming your space and making your environment work for you, instead of against you. So, grab a coffee, enjoy the quiet of a draft-free room, and give yourself some credit. You’re doing much better than you think you are.
Frequently Asked Questions
How do I know if I actually need new weatherstripping or if my door is just misaligned?
The “flashlight test” is your best friend here. Turn off the lights at night and have someone shine a flashlight around the door frame from the outside. If you see bright pinpricks of light leaking through, that’s bad weatherstripping. But, if the light is coming through in one consistent, straight line where the door meets the frame, your door is likely just sagging or misaligned. Fix the hinge before you waste money on new foam.
Can I use weatherstripping on doors that are painted, or am I going to end up with a sticky, ruined mess?
The short answer? Yes, but don’t just slap it on and hope for the best. If your door has a fresh coat of paint, wait at least a few weeks for it to fully cure, or you’ll literally peel your paint right off when you try to remove the strip later. Also, skip the super aggressive adhesives if you’re worried about the finish. Stick to high-quality rubber; it’s less likely to turn into a gummy, soul-crushing nightmare.

