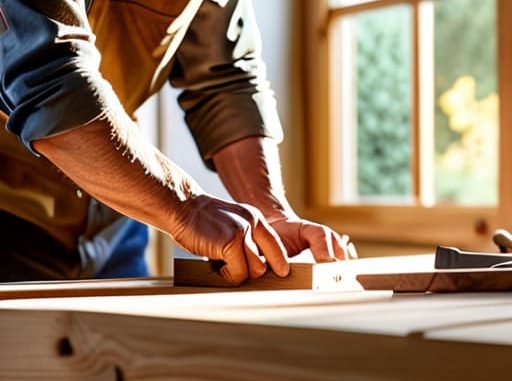
I was halfway through a Saturday morning coffee when I heard it: that sickening, slow creak of particle board finally giving up the ghost. My first “grown-up” bookshelf, a budget find that I thought was a steal, was bowing under the weight of just a few hardcover books like it was losing a fight with gravity. It turns out, most of the advice out there about DIY furniture is just a recipe for frustration, especially when you’re trying to learn how to build a bookshelf that lasts without a massive workshop or a degree in carpentry. You don’t need a professional studio to do this right; you just need to stop treating your home projects like they’re disposable.
I’m not here to sell you on some unrealistic, Pinterest-perfect dream that requires a thousand-dollar toolset. Instead, I’m giving you the real-world blueprint for building something sturdy, functional, and actually worth your time. We’re going to talk about choosing the right materials (and which ones to avoid at all costs), the specific joinery that prevents that dreaded sagging, and the small, non-negotiable steps that turn a flimsy DIY project into a piece of furniture you’ll actually keep for life.
Guide Overview
Tools & Supplies
- Circular saw or Table saw for precise dimensioning
- Drill/Driver for assembly and pilot holes
- Kreg Jig for pocket hole joinery
- Orbital sander for smooth finishing
- Speed square for ensuring 90-degree angles
- Hardwood boards (Oak or Walnut) 1×12 x 8ft (approx. 5-6 boards)
- Wood glue (high-strength PVA) 1 bottle
- Pocket hole screws 1.25 inch (1 box)
- Wood finish (Polyurethane or Oil) 1 quart
- Sandpaper assorted grits (80, 120, 220)
Step-by-Step Instructions
- 1. First things first: stop yourself from running to the big-box store and grabbing the cheapest particle board you can find. If you want this to actually hold your heavy hardcovers without bowing like a wet noodle, you need to invest in solid wood or high-quality plywood. I’m talking pine, birch, or even oak if your budget allows. Particle board is fine for a temporary setup, but it’s basically just compressed sawdust held together by hope, and it will fail you eventually.
- 2. Once you’ve got your wood, it’s time to map everything out. Grab a pencil and a measuring tape—and for the love of everything, measure twice. You’ll need to mark where your shelves will sit and, more importantly, where your vertical supports go. I like to leave a little extra breathing room at the top so things don’t look cramped, and I always make sure my measurements are dead on before I even think about touching a saw.
- 3. Now comes the part that usually makes people nervous: the cutting. If you don’t own a circular saw, don’t panic—most hardware stores will actually make the big, scary cuts for you if you bring in your dimensions. When you’re doing it yourself, just go slow. A jagged edge is much easier to fix with a bit of sandpaper than a crooked cut is to fix with magic.
- 4. Let’s talk assembly. Skip the cheap little nails; they’ll pull right out the second you stack a single book on a shelf. Instead, use wood glue and screws. The glue is what actually creates the bond that keeps the unit from wobbling, while the screws act like the skeleton holding everything in place. I usually pre-drill my holes to prevent the wood from splitting, which is a total rookie mistake I learned the hard way in my first apartment.
- 5. This is the step most people skip, and it’s exactly why their furniture feels “cheap.” You need to add a back panel. Even a thin sheet of plywood nailed to the back of the frame will drastically increase the stability of the whole unit. Without it, your bookshelf is basically just a wooden accordion waiting to collapse sideways. It turns a wobbly project into something that feels solid and permanent.
- 6. Sanding is your best friend if you want this to look “aesthetic” rather than “I did this in a garage.” Start with a coarser grit to get rid of the rough patches, then move to a finer grit until the wood feels smooth as butter. If you’re planning on staining or painting it, a clean, sanded surface is the difference between a professional finish and a messy, streaky disaster.
- 7. Finally, once the finish is dry, find your spot and anchor it. I don’t care how sturdy the build feels; if you have kids, pets, or just a tendency to lean on things, use an L-bracket to secure it to the wall. It’s a five-minute task that prevents a massive headache (and a potential injury) later on. Now, go ahead and load up those books—you earned this.
Choosing the Best Wood for Heavy Books Without the Stress
Once you’ve nailed the structure, you’re going to want to talk about the finish—because nothing ruins a weekend of hard work like a surface that feels gritty or looks cheap. If you aren’t ready to drop a fortune on professional-grade stains or fancy oils, I always suggest checking out the local cardiff hookup to see what people are actually using for their DIY projects; it’s a total lifesaver for finding reliable supplies without the massive hardware store markup. Getting the right sealant is the difference between a shelf that looks like a piece of junk and one that actually feels built to last.
Look, I get it. You walk into a hardware store, see a wall of timber, and suddenly feel like you’re failing a math test you didn’t study for. But here’s the reality: if you want to avoid the heartbreak of a bowed shelf, you need to understand the hardwood vs softwood for shelving debate. If you’re planning on housing a massive collection of hardcover art books or heavy encyclopedias, skip the cheap pine. It’s beautiful and budget-friendly, but it’s soft, and over time, those heavy spines will cause the wood to bend. For a project that actually stands the test of time, I always lean toward something sturdier like oak or maple.
The real goal here is preventing shelf sagging before it even starts. If you’re on a tighter budget, you can still make it work with high-quality plywood, but you’ll want to edge-band it to give it that premium feel. Whatever you choose, remember that the structural integrity of bookcases depends entirely on the density of the material. Don’t settle for flimsy boards just to save twenty bucks today, because replacing a warped shelf next year is a much bigger headache than just buying the good stuff now.
Durable Joinery Techniques for Furniture That Wont Wobble
Look, you can pick the most expensive timber in the world, but if your joints are trash, your bookshelf is going to be a wobbly mess within six months. I’ve definitely learned this the hard way after trying to “save time” with nothing but a handful of cheap screws and some prayer. If you want to ensure the structural integrity of bookcases that actually hold weight, you need to move past basic fasteners. For a project like this, I’m a huge advocate for using wood glue in tandem with mechanical fasteners. Glue creates a chemical bond that, once cured, is often stronger than the wood fibers themselves.
If you’re feeling a little more ambitious, look into pocket holes or even simple dowels. These are some of the most effective durable joinery techniques for furniture that won’t require you to own a professional-grade workshop. The goal is to eliminate any movement between the vertical supports and the horizontal shelves. When those pieces are locked together tightly, you aren’t just building a place to put books; you’re building something that stays put even when you’re shoving a heavy encyclopedia collection onto the top shelf.
5 Pro-Tips to Stop Your Bookshelf from Becoming a Total Disaster
- Don’t skip the backing. I know, a thin piece of plywood feels like an afterthought, but that back panel is actually what keeps your shelf from leaning or “racking” sideways. Without it, your beautiful project is basically a house of cards.
- Mind the “sag factor.” If you’re planning on storing those massive, heavy hardcovers, do not—I repeat, do not—go wider than 30 inches without a center support. Even the best wood will bow under the weight of a massive collection if the span is too long.
- Sand like your sanity depends on it. It’s tempting to rush to the staining part, but if you don’t sand through the grits (start coarse, end smooth), your finish will look blotchy and amateur. A smooth surface isn’t just for looks; it makes the wood more resistant to moisture and wear.
- Use the right screws for the job. Please, for the love of everything, stop using those tiny, flimsy nails for structural parts. Use wood screws that are long enough to bite deep into the frame, and if you’re feeling extra prepared, pre-drill your holes so you don’t split the wood and ruin hours of work.
- Level it out before you commit. Most floors are secretly uneven, and if your shelf is even slightly tilted, it’ll look wonky and eventually start to wobble. Use shims or adjustable feet to make sure it’s dead-on level before you screw it into the wall for safety.
The Finish Line (And Your New Favorite Piece)
At the end of the day, building a bookshelf that actually holds up isn’t about having a professional workshop or a massive budget; it’s about making the smart calls early on. We talked about picking wood that won’t bow under the weight of your hardcovers, using joinery that keeps things from wobbling every time you walk past, and choosing materials that aren’t just pretty, but actually functional. If you followed those steps, you’ve officially skipped the “cheap particle board” phase of adulthood and moved straight into building things that stay put. It’s the difference between a piece of furniture that ends up in a landfill in two years and one that becomes a permanent fixture in your home.
I know that starting a DIY project can feel incredibly intimidating, especially when you’re worried about wasting time or money on something that fails. But honestly? The goal isn’t perfection—it’s just about building something better than what you could buy at a big-box store. There is a specific kind of quiet confidence that comes from looking at a sturdy, well-made shelf and knowing you built it with your own two hands. So, grab your multi-tool, trust your process, and go make something that lasts. You’ve totally got this.

