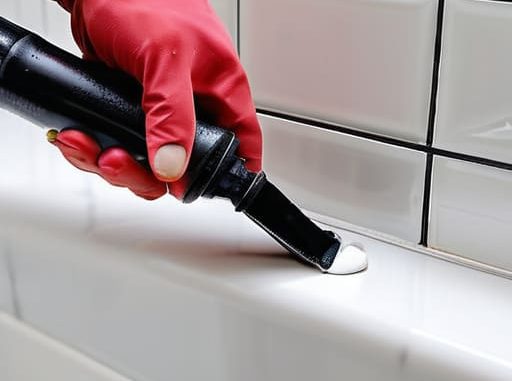
I was staring at a growing, blackened gap between my bathtub and the wall, feeling that familiar wave of “adulting failure” wash over me. I honestly thought that learning how to caulk was one of those high-stakes DIY skills that required a professional contractor and a degree in engineering. But after my first disastrous attempt—which ended with more silicone on my floor than in the actual crack—I realized the truth: it’s not about being a master craftsman, it’s just about not overthinking the process.
I’m not here to give you a lecture on chemical compositions or complicated structural integrity; I just want to help you fix that gap so you can stop worrying about mold and start enjoying your space. In this guide, I’m breaking down the exact, low-stress steps I use to get a seamless finish without the total meltdown. We’re going to cover the right tools, the messy middle part, and the one trick that makes smoothing everything out actually easy.
Guide Overview
Tools & Supplies
- Caulking gun to apply the sealant
- Caulk removal tool or utility knife to strip old material
- Wet rag to clean up excess residue
- Caulk tube (Silicone or Acrylic depending on surface)
- Painter's tape to ensure clean lines
Step-by-Step Instructions
- 1. First things first: you have to clear out the old junk. If you’re trying to layer new caulk over old, peeling stuff, it’s going to look like a disaster and eventually fail. Grab a utility knife or a dedicated caulk removal tool and carefully slice away the old sealant. I know it’s tedious, but cleaning the slate is the only way to make sure the new stuff actually sticks.
- 2. Once the old gunk is out, you need to go on a deep-cleaning mission. Use a vacuum to suck up the debris, and then wipe the area down with a bit of rubbing alcohol or a mild cleaner. You want that surface to be completely dry and bone-dry before you even think about touching the caulk gun. If there’s even a hint of moisture or dust left, your hard work will start peeling in a week.
- 3. Now, let’s prep the tool. Take your caulk tube and cut the tip at a tiny, controlled angle. I used to cut huge chunks off the nozzle thinking it would make it easier, but that just leads to a massive, uncontrollable mess. Start small—you can always cut more off later, but you can’t put it back on once it’s gone.
- 4. This is where the real work happens. Hold your caulk gun at a 45-degree angle and move at a steady, consistent pace. Don’t try to go too fast, or you’ll end up with gaps, and don’t go too slow, or you’ll get a huge, ugly bulge. Think of it like drawing a continuous line rather than just squishing paste into a hole.
- 5. After you’ve laid down your bead, you need to smooth it out immediately. This is my favorite part because it’s weirdly satisfying. Dip your finger in a little bit of soapy water (seriously, a spray bottle with water and a drop of dish soap works wonders) and lightly run it along the bead. This flattens the caulk and gives it that pro-level, seamless finish that makes people think you actually know what you’re doing.
- 6. Finally, resist the urge to touch it. It might look perfect, but it needs time to cure. Depending on the type of caulk you bought, this could take anywhere from a few hours to a full day. Try to avoid getting the area wet or bumping into it during this window so the seal can set properly and permanently.
Mastering Silicone vs Acrylic Caulk for Long Term Sanity
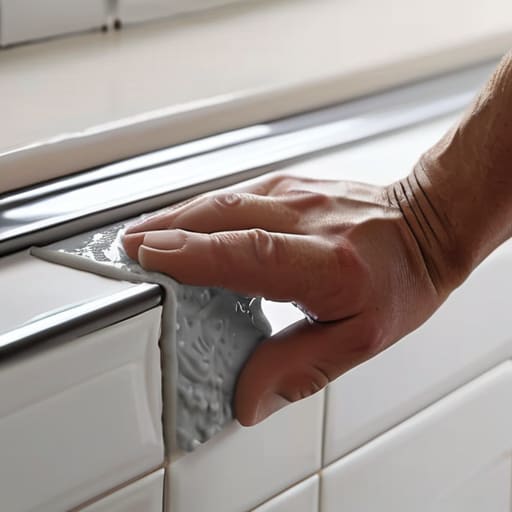
Look, I know the hardware store aisle feels like a personal attack when you’re just trying to fix a gap in your backsplash, but choosing between silicone vs acrylic caulk is actually the difference between a one-time fix and a recurring nightmare. If you’re tackling any project involving caulking bathroom fixtures or anything near a shower, go with silicone. It’s waterproof and flexible, meaning it won’t crack when the house shifts or the water hits it. Acrylic is fine for baseboards or dry areas, but if you use it in a wet zone, you’re basically inviting mold to move in and start paying rent.
Before you even think about grabbing your tool, do yourself a massive favor: remove all the old, crusty caulk first. Trying to layer new sealant over the old stuff is a total rookie mistake that guarantees a messy, peeling disaster. Once you’ve cleared the space and you’re ready for the actual application, remember that smoothing the caulk bead is all about patience (and maybe a little bit of soapy water on your finger). Get it right the first time, and you won’t have to deal with this again in six months.
The Secret to Removing Old Caulk Without the Stress
Look, I’m going to be real with you: the part everyone dreads isn’t actually the application—it’s the prep. If you try to layer new sealant over the old, crusty stuff, you’re basically setting yourself up for a messy, expensive failure. Removing old caulk is a total vibe killer, but skipping it is how you end up with preventing water leaks actually failing you in six months. Grab a utility knife or a specialized caulk removal tool and just start slicing along the edge. It’s tedious, but think of it as a mindless, therapeutic task you can do while listening to a podcast.
Once you’ve scraped away the bulk of it, don’t just assume you’re done. This is where most people mess up. You need to get every single microscopic bit of residue off the surface, or your new bead won’t stick. I swear by using a damp microfiber cloth and a little bit of rubbing alcohol to wipe down the area. If the surface isn’t completely clean and bone-dry, your hard work is basically going down the drain. Take the extra ten minutes now so you aren’t re-doing this whole ordeal next season.
Three Pro-Tips to Keep Your Caulking from Looking Like a Total Disaster
- Don’t skip the painter’s tape. If you aren’t feeling 100% confident in your steady hand, run two strips of tape along the edges of the gap you’re filling. It creates a perfect, crisp line so you don’t end up with a messy smear all over your tiles.
- Use a wet finger (or a spray bottle) to smooth it out. Once you’ve laid down a bead, lightly run a damp finger over the line to level it. It sounds simple, but it’s the difference between a DIY job that looks professional and one that looks like a middle school art project.
- Clean the area like your life depends on it. Even if it looks clean, grab some rubbing alcohol and wipe down the surface before you start. If there’s any lingering soap scum or dust, that new caulk isn’t going to stick, and you’ll be back here re-doing the whole thing in two weeks.
The TL;DR on a Stress-Free Seal
Don’t skip the prep—if the surface isn’t bone-dry and totally clean, your new caulk is going to peel off faster than my motivation on a Monday morning.
Pick the right tool for the job: use silicone for anything wet (like your tub or sink) and acrylic for baseboards or walls where you might need to paint over it later.
You’ve Got This
At the end of the day, caulking is really just about preventing a much bigger, much more expensive headache down the road. Whether you spent the afternoon scrubbing away old residue or finally figured out the difference between silicone and acrylic, you’ve done the heavy lifting. Just remember: prep is everything, keep your finger steady, and don’t be afraid to wipe it away and try again if the first bead looks a little wonky. It’s not about achieving surgical perfection; it’s about creating a solid seal that keeps your space dry and your sanity intact.
I know that staring down a messy, half-finished bathroom project can feel like just another thing on your “adulting is hard” checklist. But look at you—you actually tackled it. Taking these small, proactive steps is how we stop living in a constant state of crisis management and start actually owning our spaces. You didn’t just fix a gap in your tub; you mastered a new skill and saved yourself a massive renovation later. Go grab a coffee, take a look at your handiwork, and give yourself some credit.
Frequently Asked Questions
How do I know if I actually need to re-caulk, or if it's just a cosmetic issue?
Here’s the deal: if it’s just a tiny discoloration or a little bit of surface mold, you might be able to save it with a deep clean and some bleach. But if you see actual cracks, peeling, or—the absolute worst—water seeping behind the gap, stop playing games. That’s not a cosmetic issue; that’s a “call the landlord or grab the caulk gun” emergency. Don’t let a small gap turn into a massive mold headache.
Can I caulk over my old, messy layer, or am I definitely going to have to scrape it all off first?
Look, I get the temptation to just layer more on top to save time, but please—don’t do it. If you caulk over a messy, old layer, the new stuff won’t actually bond to the surface. You’ll end up with a chunky, peeling disaster within a month, and then you’re back to square one. It’s a total “fake it ’til you make it” fail. Scrape it clean first; your future, less-stressed self will thank you.