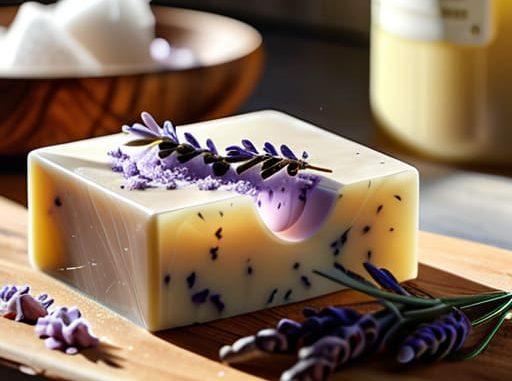
I was standing in my tiny kitchen, staring at a mountain of half-empty, neon-colored plastic bottles and wondering why I was paying a premium for ingredients I couldn’t even pronounce. Most people think that learning how to make soap requires a professional-grade laboratory and a chemistry degree, but honestly? That’s just a way to make a simple process feel way more intimidating than it actually is. I learned the hard way that you don’t need a massive budget or a sterile lab to create something that actually works for your skin and your sanity.
In this guide, I’m stripping away all the gatekeeping and the overly complicated “aesthetic” fluff you see on TikTok. I’m going to walk you through a straightforward, low-stress method that focuses on what actually matters: quality ingredients and minimal waste. You’ll get a clear, no-nonsense breakdown of the essentials so you can stop overthinking it and finally start making your own custom bars without the unnecessary chaos.
Guide Overview
Tools & Supplies
- Digital scale for precise measurements
- Stick blender for emulsifying oils and lye
- Heat-resistant glass beaker or pitcher for lye solution
- Silicone molds for shaping the soap
- Coconut oil (approx. 16 oz)
- Olive oil (approx. 16 oz)
- Sodium hydroxide/Lye (approx. 5 oz)
- Distilled water (approx. 10 oz)
- Essential oils (approx. 1 oz)
Step-by-Step Instructions
- 1. First things first, we need to talk safety because lye is no joke. I know, it sounds intimidating, but as long as you’re wearing your safety goggles and gloves, you’ll be fine. Clear off a decent amount of counter space, grab a dedicated plastic or stainless steel pitcher (please, do not use aluminum), and make sure you’re in a well-ventilated area. You don’t want to be breathing in those fumes while you’re trying to vibe.
- 2. Next, we’re going to prep our liquid and lye solution. Measure out your distilled water first, then slowly pour the lye crystals into the water. Never do it the other way around, or you’ll end up with a chemical volcano in your kitchen, and nobody has time for that. Stir it gently until it’s clear, and then set it aside to cool down. It’s going to get hot, so just let it hang out until it reaches a room temperature feel.
- 3. While that’s cooling, it’s time to melt your fats. Grab a large pot and combine your oils—I usually go with a mix of coconut oil for bubbles and olive oil for that gentle moisture—and melt them over low heat. Once everything is liquid and combined, take it off the stove. You’re basically waiting for your oils and your lye water to be roughly the same temperature before they meet.
- 4. Now comes the “magic” moment: combining everything. Slowly pour your cooled lye water into your pot of oils. Grab your stick blender (this is the one thing I say is actually worth the investment) and start pulsing it. You aren’t just stirring; you’re looking for “trace.” This is that specific point where the mixture reaches the consistency of thin pudding, and when you lift the blender, it leaves a little trail on the surface.
- 5. Once you’ve hit trace, it’s time to get creative with scents. This is where you can add your essential oils—lavender is my personal go-to for a chill vibe—or even some dried botanicals if you’re feeling extra aesthetic. Stir these in by hand with a spatula to make sure they’re evenly distributed throughout the batch.
- 6. Pour your mixture into your mold. I love using silicone molds because they are ridiculously easy to pop out later, but if you’re using a wooden box, make sure you line it with parchment paper first. Tap the mold firmly on the counter a few times to shake out any trapped air bubbles; it makes the final bar look way more professional and less “DIY fail.
- 7. Finally, the hardest part: waiting. Cover the mold with a piece of cardboard and a towel to keep the heat in, and let it sit for about 24 to 48 hours. Once it’s firm, pop it out and cut it into bars using a sharp knife. Now, don’t go using it immediately! You need to let these bars cure in a cool, dry place for about 4 to 6 weeks. I know, it feels like forever, but that’s how you get a hard, long-lasting bar that won’t turn into mush the second it touches water.
Mastering Cold Process Soap Making Methods Without the Chaos
If you’re feeling a little overwhelmed by all the different cold process soap making methods floating around YouTube, take a breath. You don’t need a professional laboratory to get this right. My biggest piece of advice? Don’t eyeball anything. I used to think I could just “wing it” with the measurements, but that is a one-way ticket to a soap bar that’s either too greasy or way too harsh. Seriously, invest ten minutes in finding a reliable lye and oils ratio calculator online before you even touch a single ingredient. It’s the difference between a luxury bar and a total kitchen disaster.
Also, let’s talk about the vibe of your workspace. While I love a good aesthetic setup, your priority needs to be your gear. Make sure you have your soap making safety equipment—think goggles and gloves—laid out and ready to go before you start mixing. It sounds extra, but when you’re dealing with lye, you want to be focused on the chemistry, not scrambling for protection mid-process. Once you have the safety basics down, the actual crafting part feels way more like a creative outlet and way less like a high-stakes science experiment.
Essential Oils for Natural Soap That Actually Calm Your Senses
Once you’ve mastered the basics of your lye and oils ratio calculator, the real magic happens when you start playing with scent. I used to think all essential oils were created equal, but I quickly learned that some are way more temperamental than others during the curing process. If you’re looking for that spa-like vibe, I swear by lavender and cedarwood; they are incredibly stable and won’t disappear the moment your soap hits the drying rack. When selecting essential oils for natural soap, aim for high-quality, therapeutic grade stuff—it makes a massive difference in how the scent actually lingers on your skin.
Just a quick heads-up from someone who has definitely learned the hard way: scent is a sensory experience, but it’s also chemistry. Some oils, like citrus, can be quite volatile, so you might need to tweak your scent load to keep things balanced. If you’re leaning into natural soap ingredients for skin health, try pairing tea tree with eucalyptus for a refreshing, antimicrobial bar. It’s all about finding that sweet spot where the scent feels intentional rather than overwhelming.
Three things I wish I knew before my first batch turned into a disaster
- Don’t skip the scale. I know, measuring by volume with measuring cups feels faster, but soap making is basically chemistry, and being “close enough” is how you end up with a bar that’s either a puddle or a brick. Get a cheap digital scale and weigh everything in grams—your skin (and your sanity) will thank you.
- Safety isn’t optional, even if you’re just doing this in your kitchen. Lye is no joke; it can cause actual burns if you aren’t paying attention. I always wear my goggles and gloves, and I make sure my workspace is clear of any pets or roommates before I even crack the seal on the lye container. Better safe than sorry.
- Embrace the “ugly” phase. Your first batch might look like lumpy mashed potatoes or have a weird texture, and honestly? That’s fine. Soap needs time to cure, and sometimes it needs a little extra love. Don’t let a wonky-looking swirl stop you from trying again; even my “failures” usually end up being decent enough to use in the shower.
The TL;DR of Soap Making
Don’t let the science scare you off—focus on mastering one method (like cold process) before you start trying to get fancy with complex swirls or expensive additives.
Your safety is non-negotiable, so treat your lye like the serious ingredient it is, but once you have your gear and your rhythm down, it’s actually a pretty therapeutic way to decompress.
The Final Suds
Look, I know it feels like a lot when you’re staring at a pile of lye and oils, but you’ve actually got this. We’ve covered the heavy lifting—from mastering the cold process method without turning your kitchen into a disaster zone, to picking essential oils that actually smell like a spa instead of a science experiment. Just remember that the most important thing is to trust your process and keep your workspace organized. If you stick to these steps and don’t rush the curing time, you’re going to end up with something way better than anything you’d find on a drugstore shelf.
At the end of the day, soap making isn’t just about making a cleaning product; it’s about taking back a little bit of control over what goes into your body and your home. It’s one of those small, tangible wins that makes adulting feel a lot less overwhelming and a lot more intentional. So, grab your multi-tool, clear off that counter, and just start. You don’t need to be a chemist to create something beautiful—you just need to be willing to get your hands a little messy.
Frequently Asked Questions
Is it actually safe to handle lye at home, or am I going to end up in the ER?
Look, I get it—the word “lye” sounds like something straight out of a chemistry lab accident. But honestly? It’s totally safe if you stop treating it like a casual hobby and start treating it like a serious tool. As long as you’re wearing your gloves, eye protection, and working in a ventilated space, you’re fine. I’ve spilled a little before, and while it stings, it’s not an ER trip if you follow the rules.
Can I use leftover coffee grounds or dried flowers for texture, or will that just make my soap look like a mess?
Honestly, you can totally do both, but there’s a catch. Coffee grounds are amazing for a DIY exfoliating bar—just don’t go overboard or it’ll look like muddy sludge. For dried flowers, they add that gorgeous, aesthetic vibe, but fair warning: some petals can turn brown once they hit the lye. My hack? Use them sparingly on top for the look, or stick to grounds if you want a functional scrub that actually works.