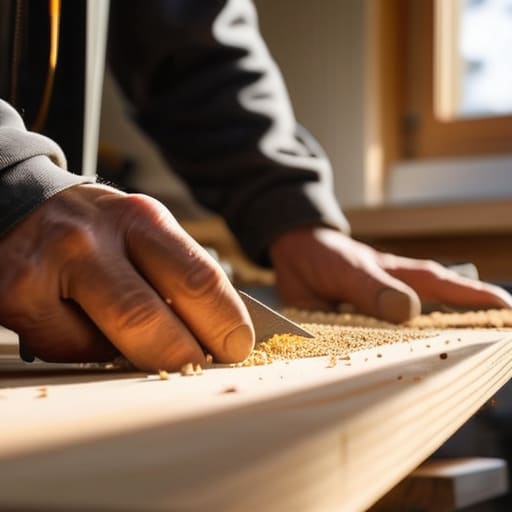
I was sitting on my floor three years ago, surrounded by a graveyard of particle board and those tiny, soul-crushing Allen wrenches, wondering why I ever thought I could do this myself. Most people think you need a workshop full of heavy-duty power tools and a carpenter’s license to master how to build a desk, but honestly? That’s a total myth. You don’t need a massive budget or a degree in woodworking to create a workspace that doesn’t wobble every time you type an email; you just need a solid game plan and the right mindset.
In this guide, I’m stripping away all the intimidating jargon and the “pro-level” fluff that nobody actually uses. I’m going to walk you through the exact, low-stress steps I use to assemble functional, aesthetic workspaces without losing my sanity or breaking the bank. Whether you’re working with a tiny studio apartment or a dedicated home office, we’re going to get you a desk that actually works for your life.
Guide Overview
Tools & Supplies
- Drill/Driver for assembling screws
- Measuring Tape for precise cuts
- Sandpaper for smoothing surfaces
- Level to ensure a flat workspace
- Wood Plywood or Solid Wood Board (1 desktop piece)
- Wood Legs (4 pieces)
- Wood Screws (1 box)
- Wood Glue (1 bottle)
Step-by-Step Instructions
- 1. First things first: get your supplies together so you aren’t mid-project and realizing you’re missing a crucial screw. You’ll need a tabletop (I love a thick butcher block if you have the budget, but a solid IKEA tabletop works too), four legs (hairpin legs are my absolute favorite because they look chic and are ridiculously easy to attach), a drill, and some wood screws. If you don’t own a drill, don’t panic—just borrow one from a neighbor or hit up a hardware store.
- 2. Clear a decent amount of floor space. You don’t need a workshop, but you do need enough room to flip the tabletop over without hitting your shins on a coffee table. Lay down a blanket or some cardboard to protect the surface of your wood; the last thing we want is to scratch your brand-new desk before you’ve even sat down at it.
- 3. Flip your tabletop upside down so the underside is facing up. Grab your legs and start with the first corner. I highly recommend measuring twice before you actually drive the screws in. You want to make sure the legs are positioned far enough from the edges so they look intentional and don’t make the desk feel top-heavy or wobbly.
- 4. This is where people usually get frustrated, so take it slow. Hold the leg in place and use a pencil to mark exactly where the screw holes are. Once you’re happy with the placement, use your drill to make pilot holes first. This is a total pro tip: if you try to screw directly into the wood without a pilot hole, you run a massive risk of splitting the tabletop, and that is a major vibe killer.
- 5. Now, actually attach the legs. Line them up with your pilot holes and drive the screws in. If you’re using a power drill, keep the torque setting low so you don’t strip the screw heads or go too deep into the wood. You want them snug and secure, but you aren’t trying to win a heavy machinery competition here.
- 6. Repeat this process for the remaining three legs. Double-check that they are all facing the same direction and that the screw heads are flush with the metal. If one leg feels a little wonky, don’t just ignore it; unscrew it, re-align it, and try again. A stable desk is the difference between a productive workday and a constant battle with a wobbling monitor.
- 7. The moment of truth: flip the desk back over. If it feels sturdy, you’re golden. If it’s still rocking slightly, check to see if your floor is uneven or if one of the legs isn’t fully tightened. Once it’s steady, go ahead and clear your headspace by organizing your tech and maybe adding a small plant—you officially built your own furniture.
Choosing the Best Wood for Office Desks and Minimalist Design
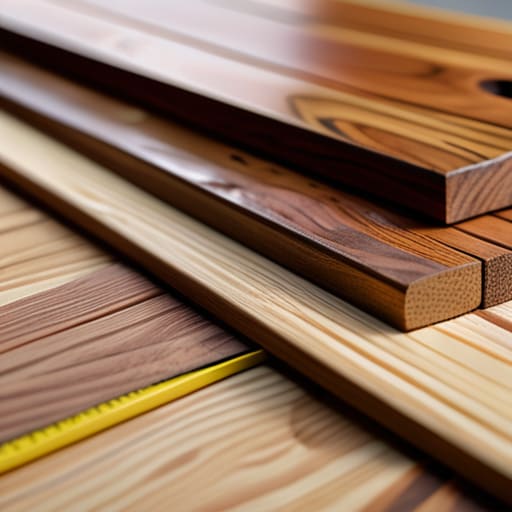
Before you even touch a screwdriver, we need to talk about the material. If you’re aiming for that clean, minimalist desk design look, don’t feel like you have to drop a month’s rent on a slab of solid walnut. Honestly, if you’re on a budget, pine is your best friend—it’s soft, easy to work with, and super forgiving if you mess up a screw. If you want something that feels a bit more “grown-up” and won’t dent every time you set down your coffee mug, go for oak or birch. Just remember that the best wood for office desks is ultimately the one that fits your vibe and your bank account without making you regret your life choices.
One thing I learned the hard way while living in a tiny studio is that “standard” sizes are a lie. Don’t just grab whatever is on sale; actually measure your space and decide on your custom desk dimensions before you head to the hardware store. There is nothing worse than finishing all your hard work only to realize your desk is two inches too wide for your nook. If you’re nervous about the actual build, don’t sweat it—you don’t need a garage full of professional-grade gear. Just grab a few basic woodworking tools for beginners and you’ll be fine.
Essential Woodworking Tools for Beginners and Custom Desk Dimensions
Before you go out and drop a paycheck on a professional workshop, let’s get real: you don’t need a garage full of heavy machinery to pull this off. When it comes to woodworking tools for beginners, I’m a huge advocate for the “buy only what you actually need” approach. A reliable cordless drill, a decent tape measure, and a sander are your best friends here. If you’re feeling extra scrappy like I used to be, you can even rent some of the heavier gear from a local hardware store instead of buying it. Just make sure you have a flat surface to work on—don’t try to assemble this on a shag rug or you’ll be fighting your floor more than the wood.
As for the actual size, don’t just wing it. I’ve seen so many people get excited about a project only to realize their new setup is either a tiny ledge or a massive behemoth that swallows their entire room. When calculating your custom desk dimensions, I highly recommend sitting in your current chair and measuring the distance from your elbows to your lap. You want enough depth so your monitor isn’t staring you down from two inches away, but enough surface area that you aren’t constantly knocking over your coffee. Measure twice, cut once, and maybe measure a third time just to be safe.
Pro-Tips to Save Your Sanity (and Your Back)
- Measure twice, cut once, then measure a third time. Seriously. There is nothing more soul-crushing than finishing a beautiful piece of wood only to realize your laptop charger won’t fit through the cable management gap you left. Don’t rush the math; your future self will thank you.
- Don’t skip the sanding phase, even if you’re in a hurry to get back to work. If you leave the surface even slightly rough, you’re going to end up with a splinter mid-email, and that is a vibe killer no one needs. Go through the grits—start coarse and work your way up to a smooth, buttery finish.
- Think about your ergonomics before you commit to a height. I know, I know, it’s tempting to just build a standard table, but if you’re a taller human or you like to sit in a specific way, a standard height might leave you hunched over like a gargoyle by 3 PM. Check your chair height first so your new desk actually works with your body.
The TL;DR for Your New Workspace
Don’t overthink the wood; pick something that fits your budget and your vibe, because a desk that’s too fancy to actually use is just expensive shelf space.
Prioritize your measurements over everything else—measure twice, cut once, and make sure you actually have enough room for your legs (and your coffee) so you aren’t fighting your furniture every single day.
You’ve Got This
At the end of the day, building a desk is less about achieving woodworking perfection and more about the intentionality of your space. We’ve covered everything from picking the right wood that won’t warp in a month to getting your dimensions dialed in so your back doesn’t ache by noon. It’s a lot of moving parts—measuring twice, choosing your tools, and actually sticking to the assembly—but once those pieces are joined, you aren’t just looking at a piece of furniture. You’re looking at a custom-built foundation for your productivity that actually fits your life, rather than some flimsy, particle-board nightmare from a big-box store.
I know it feels intimidating when you’re staring at a pile of lumber and a half-empty toolbox, but please don’t let the fear of a crooked screw stop you. Most of us are just out here winging it, and honestly? That is perfectly okay. Your first DIY project doesn’t have to be a masterpiece to be a massive win. The goal is to stop playing catch-up with your environment and start creating it. So, grab your multi-tool, take a breath, and just start building. You deserve a workspace that feels like yours.
Frequently Asked Questions
I’m working with a super tight budget—are there cheaper ways to get a high-end look without spending a fortune on solid hardwood?
Look, I get it. Solid walnut looks amazing on Pinterest, but my bank account definitely isn’t ready for those prices. If you want that high-end vibe on a budget, go with high-quality birch plywood or even a solid pine butcher block from a big-box store. The secret sauce is the finish: use a good quality wood stain and a matte sealant. It hides the “cheap” grain and makes everything look expensive and intentional.
How do I make sure my desk doesn't wobble like crazy once I actually put my monitor and gear on it?
Nothing kills my vibe faster than a monitor that dances every time I type. To stop the wobble, first, check your joints—if you’re using screws, make sure they’re tight, or better yet, use wood glue to lock everything in place. If it’s still shaky, add a cross-brace or a support rail across the back. It’s basically the “seatbelt” for your desk. It keeps everything steady so you can actually focus.

