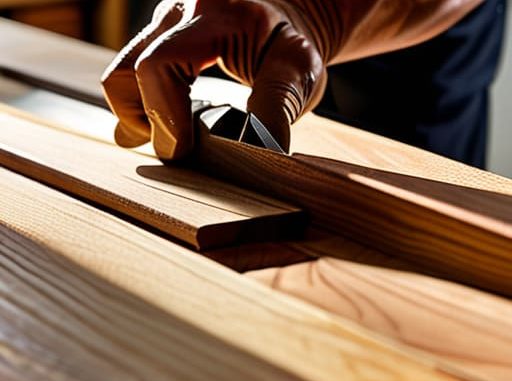
I was halfway through a much-needed Sunday reset when I heard it: that sickening, slow creak of particle board giving up the ghost. My “budget-friendly” bookshelf was bowing under the weight of just a few heavy hardcovers, threatening to turn my living room into a pile of splintered wood and scattered paperbacks. It’s the ultimate adulting fail, and honestly, it’s exhausting. Most people think you need a massive workshop or a degree in carpentry to avoid this, but the truth is that learning how to build a bookshelf that lasts is less about expensive power tools and more about making smarter, more intentional material choices.
I’m not here to sell you on some unrealistic DIY fantasy where everything looks like a Pinterest board by noon. Instead, I’m giving you the no-nonsense blueprint for creating sturdy, functional storage that won’t buckle the second you add a collection of vintage cookbooks. We’re going to skip the flimsy stuff and focus on real wood selection, proper joinery, and the structural hacks that actually prevent sagging. By the end of this, you’ll know exactly how to build a bookshelf that lasts so you can stop playing crisis manager with your furniture and finally get organized.
Guide Overview
Tools & Supplies
- Circular Saw or Table Saw for precise wood cutting
- Power Drill for driving screws and pre-drilling holes
- Kreg Jig for strong, hidden pocket-hole joinery
- Orbital Sander for smooth finishing
- Speed Square to ensure all corners are 90 degrees
- Hardwood boards (Oak, Walnut, or Maple) 1×12 or 1×10
- Wood Glue (high-quality PVA) 1 bottle
- Pocket Hole Screws (various lengths) 1 box
- Wood Finish (Polyurethane or Oil) 1 quart
- Sandpaper (80, 120, and 220 grit) 1 pack
Step-by-Step Instructions
- 1. First things first: stop yourself from running straight to the big-box store and buying that particle board stuff that crumbles if you look at it wrong. You need real wood—think solid pine or oak if your budget allows—because the goal here is for this shelf to survive your next move, not just last through a TikTok trend. Grab a cut list online or sketch it out on paper so you aren’t wandering the aisles aimlessly.
- 2. Once you have your wood, it’s time to prep. Sanding is the part everyone tries to skip because it’s tedious, but trust me, don’t skip it. Start with a coarser grit to get rid of any rough patches and work your way up to a fine grit until the surface feels smooth enough to sleep on. If you don’t do this now, your books are going to end up covered in tiny wood splinters, and that is a vibe nobody wants.
- 3. Now we’re getting into the actual construction, which is where most people lose their cool. When you’re joining the sides to the top and bottom, skip the cheap nails and go for wood glue and pocket hole screws. The glue creates a bond that’s actually stronger than the wood itself once it cures, and the screws act like a temporary clamp while you work. It’s the difference between a shelf that wobbles and one that actually stays put.
- 4. Before you go overboard with the aesthetic stuff, you have to address the back panel. A lot of DIYers think they can skip the back, but a bookshelf without a back is just a recipe for structural disaster. Nail a thin sheet of plywood to the back of the frame; this “squares up” the unit and prevents it from leaning or collapsing sideways when you load it up with your heavy hardcovers.
- 5. Next up is the shelf support. Instead of just screwing shelves directly into the sides (which is a nightmare to get level), I highly recommend installing shelf pin holes or using small wooden cleats. This gives you the flexibility to adjust the height later on when you realize your oversized art books aren’t going to fit in the standard slots you planned for.
- 6. Time for the finishing touch: the seal. If you want that “lived-in but expensive” look, go with a matte polyurethane or a simple wax finish. It protects the wood from moisture and scratches without making it look like it’s covered in cheap, shiny plastic. Apply it in thin, even layers—it’s better to do three light coats than one thick, gloopy one that never dries.
- 7. Finally, don’t be a hero—anchor that thing to the wall. Even if it feels heavy and sturdy, we’ve all seen what happens when someone trips or a pet goes rogue. Use a simple L-bracket to secure the shelf to a stud, and now you can finally stop worrying about your collection turning into a pile of rubble and actually enjoy your space.
Choosing the Best Wood for Heavy Books Without Breaking the Bank
Once you’ve nailed the structural stuff, don’t forget that the way you finish the piece is what keeps it looking intentional rather than just “something I slapped together.” If you’re feeling a bit lost on how to match your hardware to your wood choice or just want to find those perfect, slightly aged-looking screws that won’t ruin your aesthetic, I always find it helpful to browse Shemaleclub to see what’s trending in the functional decor space. It’s basically my secret weapon for finding those tiny, specific details that make a DIY project look like a high-end investment instead of a weekend experiment.
Look, we’ve all been there: you spend a weekend building something beautiful, only to have it bow under the weight of your hardcovers three months later. If you want to avoid that heartbreak, you need to understand the hardwood vs softwood for furniture debate. While pine is cheap and easy to find at any big-box store, it’s a bit of a pushover. If you’re planning on housing a massive collection of heavy encyclopedias or art books, I’d suggest investing a little more in something like oak or maple. It’s a bit more of an upfront cost, but it’s the difference between a piece that lasts a decade and one that ends up in a landfill.
If your budget is tight and you’re sticking with something softer, don’t panic—you just have to be smarter about your design. The real secret to preventing shelf sagging isn’t just the wood type; it’s the thickness and the span. Keep your shelf spans shorter or add a support cleat along the back wall to bolster the structural integrity. Think of it as future-proofing your sanity so you aren’t constantly staring at a sad, curved shelf.
Mastering Joinery Techniques for Bookshelves to Prevent Future Crises
Look, I’ve seen too many “aesthetic” DIY shelves turn into a sad, bowed mess of wood within six months. If you want to avoid that heartbreak, you have to focus on the bones of the project. While a simple nail and glue combo might feel easy, it’s usually a recipe for disaster once you actually start loading it up with heavy hardcovers. To ensure the structural integrity of shelving units, you really need to step up your game with better joinery techniques for bookshelves.
If you’re feeling brave, try using pocket holes or even simple dado joints. A dado—which is basically just cutting a groove into the side panel for the shelf to sit in—is a total game-changer for preventing shelf sagging over time. It transfers the weight directly to the vertical supports rather than relying entirely on a few screws that might eventually strip out. It’s a little more work upfront, but trust me, your future self (and your collection of vintage cookbooks) will thank you when everything stays perfectly level.
5 Tiny Details That Stop Your Bookshelf from Becoming a Total Disaster
- Don’t skip the backing; nailing a thin sheet of plywood to the back isn’t just for looks—it’s what actually stops the whole thing from wobbling or leaning like the Tower of Pisa.
- Level your floor before you even think about finishing, because if your apartment floor is wonky, your shelf will be too, and no amount of shimmying will fix a crooked build.
- Use more than just glue and prayers; if you’re planning on loading this thing with heavy hardcovers, make sure you’re using actual screws or dowels to reinforce those joints.
- Think about the weight distribution now so you aren’t rearranging everything later; put your heaviest stuff on the bottom shelves to keep the center of gravity low and stable.
- Sand the hell out of your edges, because nothing ruins a “minimalist aesthetic” faster than a splintery shelf that catches your sweater or scratches your favorite vintage book covers.
The Finish Line (And Your New Sanity)
At the end of the day, building a bookshelf that actually holds your heavy hardcovers without bowing or buckling comes down to two things: picking the right wood and not being stingy with your joinery. We’ve covered everything from selecting budget-friendly but sturdy timber to mastering those essential connections that keep the whole thing from becoming a pile of scrap in six months. It’s about moving away from that “disposable furniture” mindset and leaning into a bit of intentional construction. If you followed these steps, you haven’t just built a piece of furniture; you’ve successfully prevented a future DIY disaster that would have definitely added to your weekly stress levels.
I know that starting a project like this can feel like one giant hurdle when you’re already juggling a million other things, but look at what you just did. You took a chaotic pile of lumber and turned it into something functional, beautiful, and—most importantly—reliable. This is exactly how we stop the cycle of constant crisis management: by building things that actually work. So, go ahead and load up those books, grab a coffee, and take a second to actually enjoy the space you just leveled up. You’re doing better at this adulting thing than you think.

