I was standing in my tiny kitchen last Tuesday, staring at a thrifted, hideous mustard-yellow lamp that I’d spent way too much money on, wondering if I was about to ruin my entire weekend. We’ve all been told that if you want a professional finish, you need a studio setup and a massive budget, but honestly? That’s a total lie. Learning how to spray paint isn’t about having the fanciest gear; it’s about knowing how to work with the tools you actually have without ending up with a sticky, dripping disaster.
I’m not here to give you some polished, unrealistic DIY tutorial that requires a professional workshop. Instead, I’m sharing the real-world shortcuts I’ve learned from years of trial, error, and way too many wasted cans of paint. I’ll walk you through the exact prep steps that actually matter, how to avoid those soul-crushing drips, and the little hacks that make the whole process feel low-stress and actually doable in a small apartment.
Guide Overview
Tools & Supplies
- Spray paint cans and nozzles for application
- Sandpaper for surface preparation
- Drop cloths or newspaper to protect surfaces
- Painter's tape for masking edges
- Surface cleaner or degreaser (1 bottle)
- Primer (1-2 cans depending on size)
- Spray paint (2-3 cans depending on project)
Step-by-Step Instructions
- 1. First things first: you need to clear a workspace that isn’t your entire living room. Grab some old newspapers or a cheap drop cloth—don’t even think about doing this on your nice rug—and find a spot with decent ventilation. If you’re working indoors, crack every single window you own; trust me, you do not want to be breathing in those fumes for the next three hours.
- 2. Prep is the part everyone tries to skip, but it’s actually the most important. Grab a sponge and some mild soap to scrub down your item to get rid of any dust, oils, or that weird sticky residue from old stickers. If you’re painting something smooth like metal or plastic, a quick hit with some fine-grit sandpaper will give the paint something to actually grab onto, otherwise, it’ll just slide right off.
- 3. Now, let’s talk about masking. If your item has parts that shouldn’t be colored—like a wooden handle on a metal tray—use painter’s tape to cover them up. Be super meticulous here; if you leave even a tiny gap, you’re going to end up with a messy line that’ll haunt your dreams every time you look at your new DIY project.
- 4. Before you even touch the actual object, give your spray can a good shake for at least a full minute. It sounds extra, but you need to make sure all the pigment is fully mixed. Then, do a test spray on a piece of scrap cardboard. This helps you figure out how much pressure to use and ensures the nozzle isn’t acting up or spitting out huge, ugly globs.
- 5. When you’re ready to go, keep the can about 8 to 12 inches away from your project. The secret to a professional finish is using thin, light coats. Do not—I repeat, do not—try to cover the whole thing in one go. You’ll end up with those annoying drips that look like a toddler’s art project. It’s much better to do three thin layers than one thick, soggy one.
- 6. As you spray, move your hand in a steady, sweeping motion, starting the spray before you hit the object and stopping it after you’ve passed it. This prevents paint from pooling at the edges. If you feel like you’ve reached full coverage after the first coat, let it dry completely before even thinking about doing the next one.
- 7. Once you’ve finished your last coat, let it sit. I know, the temptation to touch it and see if it’s dry is real, but resist it. Give it at least a few hours (or even overnight if you can) to fully cure. Once it’s dry, carefully peel off your painter’s tape while the paint is still slightly “tacky” to get the cleanest possible lines.
Mastering Spray Paint Surface Preparation Without the Stress
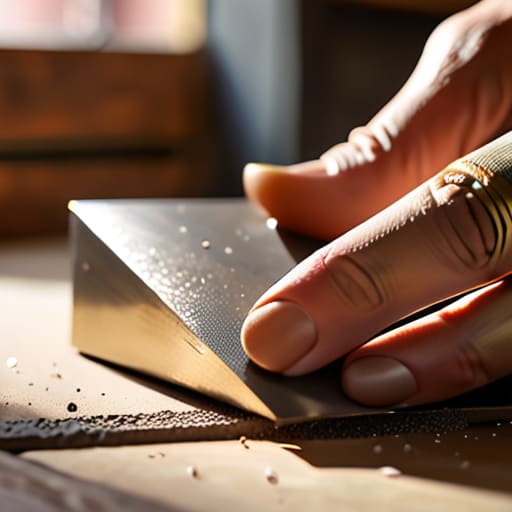
Look, I get it. The idea of spending two hours scrubbing a piece of thrifted decor feels like a massive chore when you just want to see the finished product. But here’s the tea: skipping the spray paint surface preparation is the fastest way to turn a cute project into a sticky, peeling disaster. If you’re working with something smooth like metal or plastic, you absolutely need to hit it with a quick sanding. It creates “teeth” for the paint to grab onto, which is basically the secret sauce for preventing spray paint drips and uneven patches later on.
Once you’ve cleaned off the dust, don’t even think about skipping the primer. I know, I know—it’s an extra step. But using a solid primer for spray painting acts as the bridge between your object and that gorgeous new color you picked out. It levels out the surface and ensures your color looks rich and even rather than streaky. Just make sure you give it enough spray paint drying time before you move to your actual color coat. Trust me, rushing this part is how you end up with a tacky mess that ruins your entire weekend.
Finding the Best Spray Paint for Diy Projects Fast
Look, I know the aisle at the hardware store can feel like a fever dream when you’re staring at fifty different cans of varying colors and finishes. My biggest piece of advice? Don’t just grab the cheapest can because it’s on sale. If you’re working on something that’s going to get handled a lot—like a thrifted lamp or a small side table—investing in the best spray paint for DIY projects is non-negotiable. I usually look for brands that promise a high-quality finish with minimal overspray, which saves me so much time on cleanup later.
Also, please, for the love of everything, don’t skip the primer. I learned that the hard way when I tried to paint a metal tray and it peeled off like a bad sunburn within a week. Using a dedicated primer for spray painting creates that essential bond between your object and the color. It also helps even out the spray paint drying time, so you aren’t stuck waiting forever for a tacky, uneven mess to set. Match your primer to your surface material, and your future self will thank you.
Three Pro Moves to Keep Your Project From Turning Into a Disaster
- Don’t be a hero with the pressure; shake that can like it owes you money for at least two full minutes, then do a quick test spray on a piece of cardboard first to make sure the nozzle isn’t acting possessed.
- Think “light mist,” not “drowning it in paint”—it’s way better to do three thin, breezy coats than one thick, gloopy layer that ends up looking like a melted candle.
- Keep your hand moving constantly in a sweeping motion; if you pause for even a second while the can is aimed at your project, you’re going to end up with a massive, ugly drip that’ll haunt your dreams.
The TL;DR Version
Don’t rush the prep; spending ten minutes cleaning your surface is the difference between a professional finish and a sticky, peeling disaster that you’ll regret by Tuesday.
Think in thin layers, not one heavy coat—it’s way faster (and way less messy) to do three light passes than to try and fix a giant, dripping blob of paint later.
The Final Polish
Look, if you follow the steps—cleaning that surface like your life depends on it, picking the right paint, and actually patience during those thin, light coats—you’re going to see a massive difference. It’s not about being a professional artist; it’s about the small details that prevent that dreaded peeling or drip-fest later on. Just remember that prep work is 90% of the battle, and if you rush the drying time, you’re just asking for a sticky, ruined mess.
At the end of the day, don’t let the fear of a little overspray keep you from breathing new life into your space. We’ve all had those “oops” moments where a project goes sideways, but that’s just part of the learning curve. Grab your multi-tool, put on a good playlist, and just start creating. You don’t need a perfect studio to make something beautiful; you just need the willingness to get your hands a little dirty and make your home feel like yours.
Frequently Asked Questions
How do I stop the paint from looking all splotchy and uneven?
The “splotchy” look is usually just a sign that you’re being too impatient. I used to try and cover everything in one heavy coat, and let me tell you, it’s a disaster. The secret is thin, misty layers. Think of it like a light dusting rather than a heavy coat of liquid. Do three or four super thin passes, letting it dry slightly in between. It takes longer, but it’s way less soul-crushing than sanding down a mess later.
Do I actually need to wear a mask, or is that just being extra?
Look, I get it—you’re in the zone and don’t want to feel like you’re prepping for a hazmat situation. But no, it is definitely not “being extra.” Spray paint fumes are no joke, and breathing in those tiny particles is a fast track to a massive headache (or worse). Grab a decent respirator. It might feel a little dramatic for twenty minutes, but your lungs will thank you later. Trust me, don’t skip this.