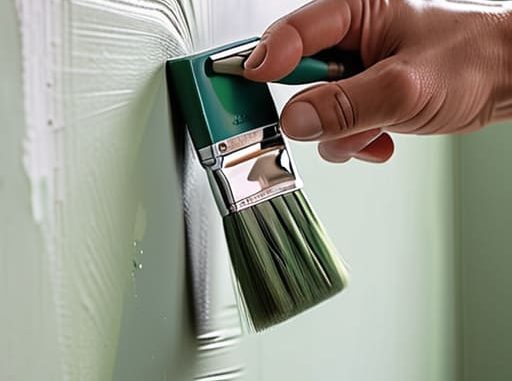
I was standing in the middle of my first studio apartment, staring at a wall that looked like a crime scene of beige-on-beige, clutching a single cheap brush and wondering why everything felt so overwhelming. I thought learning how to paint a room was just about picking a pretty color and slapping it on, but I quickly learned that without a plan, you’re basically just making a massive mess in your own living space. I spent three hours scrubbing dried drips off my floor because I skipped the prep work, and honestly, I was one minor inconvenience away from a total meltdown.
But look, I’ve done the trial and error so you don’t have to. This isn’t some professional contractor’s manual; it’s a no-nonsense guide designed to help you get it done without losing your sanity or your security deposit. I’m going to walk you through the actual, gritty details—from the specific tools that aren’t a total waste of money to the prep steps that actually matter—so you can transform your space and finally feel like you’ve got your life together.
Guide Overview
Tools & Supplies
- Paint roller and tray for large surfaces
- Angled brush for edges and corners
- Painter's tape for clean lines
- Drop cloth to protect flooring
- Interior paint 1-2 gallons per color
- Painter's tape 1 roll
- Sandpaper fine grit for smoothing walls
- Spackle small container for hole repair
Step-by-Step Instructions
- 1. First things first: clear the deck. You can’t effectively paint if you’re constantly shimmying around a heavy armchair or tripping over stray shoes. Move all your furniture to the center of the room and cover it with old sheets or actual plastic drop cloths. If you have small items like books or trinkets, just toss them into a laundry basket and move them to another room entirely. Trust me, you want as much open floor space as possible so you aren’t playing Tetris while you’re trying to focus.
- 2. Next, we tackle the prep work, which is honestly the most important part. Grab some painter’s tape and run it along your baseboards, window frames, and the ceiling edge. Don’t be stingy here—if there’s a gap, the paint will find it. While you’re down there, take a damp cloth and wipe down the walls to get rid of any dust or cobwebs. If you try to paint over a dusty wall, the new color is going to peel off like a bad sunburn, and nobody has time for that.
- 3. Now, let’s talk about those pesky holes. If you’ve got nail holes from old posters or those random dents from moving day, grab a small tub of spackle and a putty knife. Fill them in, let them dry, and then lightly sand them down until the wall feels completely smooth to the touch. If you skip this, your new paint job will basically act like a spotlight for every imperfection in your walls.
- 4. Before you even touch a brush to the wall, you need to “cut in.” This is just a fancy way of saying you’re going to paint the edges where a roller can’t reach. Use a small, angled brush to paint a border around the ceiling, the corners, and along the baseboards. It’s a little tedious, but doing this first means you can go ham with the roller later without worrying about massive streaks of unpainted drywall.
- 5. Time for the main event: rolling the paint. Don’t just go wild and slather it on; you want to work in small sections, usually about a 3×3 foot area at a time. Use the “W” or “M” technique—meaning you move the roller in a wide W shape before filling in the gaps—to ensure the coverage is even. This prevents those annoying roller marks that make a room look amateur. If the paint feels too thick or you’re struggling to spread it, you might need to lightly dampen your roller cover with water first.
- 6. Once your first coat is down, step back and let it dry completely. I know, I know, it’s tempting to go in for round two immediately, but if you apply a second coat while the first is still tacky, you’ll just end up pulling the paint right off the wall. Most latex paints need a few hours. Once it’s dry, repeat the rolling process for the second coat. This is where that professional, saturated look really happens.
- 7. The final step is the most satisfying: the Great Unveiling. Wait until the paint is mostly dry (but not necessarily bone-hard) before you peel off your painter’s tape. Pull the tape at a 45-degree angle away from the wall to get a crisp, clean line. If you wait until the paint is totally cured, the tape might actually rip chunks of your beautiful new color right off with it. Once the tape is gone, move your furniture back in, and you’re officially an adulting pro.
The Essential Painting Supplies Checklist for Sanity
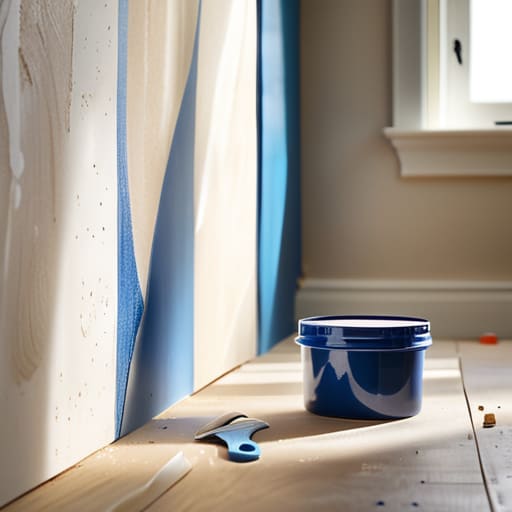
Look, nothing kills my vibe faster than being halfway through a wall and realizing I’m out of painter’s tape or, even worse, that I didn’t buy enough drop cloths. If you want to avoid that mid-project meltdown, you need a solid essential painting supplies checklist before you even crack open a can. Beyond the obvious brushes and rollers, grab a high-quality putty knife and some spackle. You’ll want to know how to prep walls for painting by filling those tiny inevitable nicks and dents first; if you skip this, your new color is just going to highlight every imperfection in the drywall.
When it comes to the actual gear, don’t cheap out on the rollers. A cheap sponge on a stick is a recipe for streaks and a massive headache. I always suggest investing in a decent microfiber cover—it makes learning how to use a paint roller feel way more intuitive and much less like a chore. Also, a pro tip from my small-apartment days: spend the extra five bucks on heavy-duty plastic sheeting for protecting furniture while painting. It’s much easier to move a lightweight sheet than it is to scrub dried latex out of your favorite thrifted velvet armchair.
How to Prep Walls for Painting Without the Chaos
Look, I know the temptation to just dive in with a brush is real, but if you skip the prep, you’re basically asking for a headache later. The secret to how to prep walls for painting without ending up in a cleaning crisis is all about the surface quality. Grab a damp microfiber cloth and wipe down those walls; I’m telling you, dust is the enemy of a smooth finish. If you have any weird scuffs or tiny holes from old command strips, hit them with a little spackle now. Sand it down until it’s flush, or your new coat of paint will just highlight every single imperfection like a spotlight.
Once the walls are actually clean, focus on protecting furniture while painting so you aren’t spending your entire Sunday scrubbing dried droplets off your favorite chair. Don’t just throw a thin sheet over things—use actual plastic drop cloths or old bedsheets you don’t mind ruining. Pull your heavy pieces to the center of the room and cover them completely. It takes ten extra minutes, but it’s way better than the alternative of living in a splatter zone for the next week.
Three Pro-Tips to Save Your Sanity (and Your Floors)
- Don’t skip the lighting check. I used to pick a color in a bright store, only to realize my living room looks like a moody cave once I actually got home. Grab a sample pot, paint a large square on your wall, and look at it in the morning, afternoon, and under your lamps at night before you commit to the whole gallon.
- Invest in a decent angled brush, not the cheapest one in the aisle. There is nothing more soul-crushing than trying to cut in a ceiling line and watching cheap bristles shed tiny hairs into your fresh, wet paint. It’s one of those “buy once, cry once” situations that actually pays off.
- Keep a damp rag in your back pocket. Seriously. No matter how much tape you use, there’s always going to be a tiny drip or a smudge. If you catch it while the paint is still tacky, it’s a five-second fix; if you wait until it dries, you’re looking at a whole new project of sanding and repainting.
The TL;DR for a Stress-Free Room Refresh
Don’t skimp on the prep work; spending an extra hour cleaning and taping now prevents a massive, soul-crushing headache once the paint actually starts hitting the walls.
Quality over quantity applies to tools—invest in a decent brush and a solid roller so you aren’t fighting streaks and splatter for the entire afternoon.
The Finish Line
Honestly, once you’ve tackled the prep work and finally gotten that first smooth coat on the wall, the hardest part is actually behind you. Just remember to keep your workspace tidy as you go—tossing used rollers in a plastic bag instead of washing them mid-project is a total lifesaver when you’re tired. Don’t rush the drying process, either; let those layers set so you don’t end up with a streaky mess that you’ll just have to fix next weekend. If you stick to the plan and protect your floors, the actual painting part becomes almost meditative.
At the end of the day, your space doesn’t need to look like a professional showroom to be worth the effort. It’s about creating an environment that actually feels like you and gives you a little bit of peace when you walk through the door. You might have a few stray drips or a slightly uneven edge, but that’s just part of the process. You did the work, you saved the money, and you made it happen. You’ve got this.
Frequently Asked Questions
How do I know if I actually need a primer, or am I just wasting money?
Honestly, the “do I need primer?” question is the ultimate budget-versus-sanity dilemma. Here’s the deal: if you’re going from a super dark color to a light one, or if you’re painting over something patchy or stained, grab the primer. It’s non-negotiable to prevent the old color from bleeding through. But, if you’re just refreshing a similar shade on a clean wall? You can probably skip it and save those extra bucks for more thrifted decor.
What’s the trick to cleaning up my brushes so I don't have to buy new ones every single time?
Look, nobody has time (or money) to keep replacing brushes every time they finish a project. The trick is all in the rinse. If you’re using water-based paint, don’t just swirl it in a jar; use a dedicated brush comb or even an old comb to get the dried gunk out of the bristles. Once they’re clean, reshape them with your fingers and let them dry hanging upside down. It keeps the shape intact so they actually work next time.