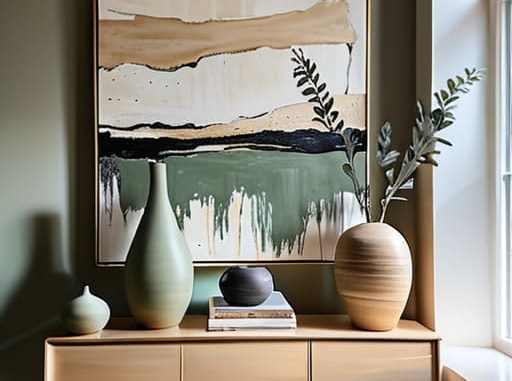
I used to stare at my apartment walls for months, convinced that if I couldn’t afford a massive gallery wall from a high-end boutique, I was just stuck with a sad, beige void. I thought learning how to make wall art meant I needed a studio apartment-sized budget and a degree in fine arts, but honestly? That’s just a lie we tell ourselves to justify living in a space that feels uninspiring. I spent way too long waiting for “someday” when I finally had the money, instead of just using the random scraps and thrifted finds I already had sitting in my junk drawer.
In this guide, I’m skipping the gatekeeping and the overly complicated “Pinterest-perfect” projects that take six hours and three mental breakdowns to finish. Instead, I’m sharing a few low-effort, high-impact ways to DIY your decor using stuff you probably already own. We’re talking about real-world hacks that actually look good, save you some serious cash, and won’t leave your living room looking like a chaotic craft store explosion.
Guide Overview
Tools & Supplies
- Paintbrush (various sizes for application)
- Palette knife (for texture creation)
- Measuring tape (to center the piece)
- Canvas (1 piece, medium size)
- Acrylic paint (set of 5-10 colors)
- Gesso (1 bottle, for priming)
- Modeling paste (1 jar, for texture)
Step-by-Step Instructions
- 1. First things first, scout your supplies without breaking the bank. Since I’m a huge thrift store enthusiast, my go-to move is hitting up the local secondhand shops for empty vintage frames. You don’t need fancy canvases; a cool old brass frame or even a sturdy piece of cardboard can work if you’re feeling extra scrappy.
- 2. Next, decide on your vibe. Are we going for “minimalist line art” or “maximalist collage”? If you’re like me and get overwhelmed by too many choices, stick to a limited color palette. Grab some scrap paper, old magazines, or even some dried flowers from that bouquet you forgot you bought last week.
- 3. Now, let’s get into the actual creation part. If you’re doing a collage, start by laying everything out on the floor before you touch the glue. I know, it feels like extra work, but rearranging paper is a lot easier than trying to peel off a sticky mess once it’s stuck to the backing.
- 4. For those who want something a bit more “artistic” but lack the actual talent, try the washi tape method. You can create geometric shapes or simple borders directly on the wall or within a frame. It’s basically the cheat code for decor because it’s easy to peel off if you change your mind later.
- 5. If you’re feeling brave enough to actually paint, grab some acrylics and a cheap set of brushes. Don’t worry about making a masterpiece; even just abstract color blocking can look incredibly intentional and high-end if you keep the shapes clean. Just remember to lay down some old newspapers so you don’t ruin your floor.
- 6. Once your masterpiece (or your “it’s fine, it’s fine” project) is dry, it’s time to mount it. If you’re renting and don’t want to lose your security deposit, command strips are your best friend. They’re much more reliable than those tiny little nails that always seem to fall out of the drywall the second you look at them.
- 7. Finally, do the “vibe check.” Step back, look at the piece from across the room, and see if it actually fits the space. If it feels a little lonely, try grouping it with other items like a small shelf or a trailing plant to give it some context. Decorating is a process, so don’t stress if it isn’t perfect on the first try.
Low Stress Mixed Media Wall Art Methods for Busy Humans
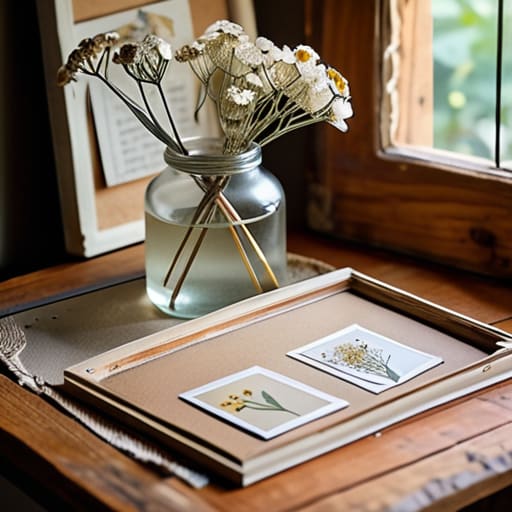
If you’re anything like me, you probably have a drawer full of random scraps—old postcards, fabric remnants, or even those dried flowers from a bouquet that actually lasted. Instead of letting them collect dust, lean into mixed media wall art methods to turn that clutter into something intentional. You don’t need a studio setup; just grab some heavy paper or a thrifted frame and start layering. It’s less about perfection and more about the vibe, which makes it one of my favorite low-stakes ways to experiment without the pressure of a “masterpiece.”
The best part is that these are some of the most budget friendly home decor projects you can tackle on a Tuesday night. You don’t need to run to a high-end art supply store; honestly, most of what you need is already in your junk drawer or recycling bin. If you’re feeling stuck, just pick a color palette first. Once you have a theme, the “art” part almost happens by accident, saving you from that dreaded creative paralysis we all face when staring at a blank surface.
Budget Friendly Home Decor Projects That Actually Look Expensive
Look, we’ve all been there—staring at a Pinterest board full of high-end galleries and then looking at our bank account like, is this even possible? The secret to achieving that high-end look without the designer price tag is all about texture and restraint. Instead of buying pre-made pieces, I love leaning into budget friendly home decor projects that rely on simple materials. Think about grabbing some leftover plaster from a hardware store or even just textured joint compound to create those 3D, sculptural pieces you see in luxury showrooms. It’s much cheaper than buying a massive canvas, and the results look incredibly intentional.
Another trick I swear by is focusing on scale rather than complexity. If you’re diving into abstract art tutorials for beginners, don’t feel like you need to paint a masterpiece. Often, a single, oversized canvas with a minimal color palette—think beige, charcoal, and cream—can act as a sophisticated focal point for an entire room. It’s less about the “art” and more about how the piece anchors your space. Just keep your color palette tight and your edges clean, and I promise no one will know you made it for under twenty bucks.
Three ways to keep your DIY sanity intact
- Don’t overthink the “perfect” vision. I used to spend hours staring at a blank canvas trying to manifest a masterpiece, but honestly? Most of my favorite pieces started as a random scrap of fabric or a cool postcard I found at a thrift store. Just grab something that catches your eye and build from there.
- Invest in the good stuff (the stuff that actually works). There is nothing more soul-crushing than trying to DIY a project and realizing your glue stick has the structural integrity of a wet noodle. Spend the extra five bucks on high-quality mounting tape or a decent set of acrylics; your future, non-frustrated self will thank you.
- Embrace the “curated mess” look. If your edges are a little wonky or your colors aren’t perfectly matched, don’t panic. That’s what makes it look lived-in and intentional rather than like a sterile showroom. If a piece feels “off,” just tuck it into a gallery wall—the layers will do the heavy lifting for you.
The TL;DR on Stress-Free Decorating
Don’t overthink it—the best art is the kind that feels like you, so don’t be afraid to mix thrifted finds with DIY projects to keep things looking intentional but not “stiff.”
Focus on high-impact, low-effort wins; you don’t need a massive budget or a degree in fine arts to turn a blank wall into a space that actually feels like home.
Final Thoughts Before You Start Creating
At the end of the day, making your own wall art doesn’t require a degree in fine arts or a massive budget. Whether you’re experimenting with low-stress mixed media, repurposing vintage finds, or following a budget-friendly DIY that looks high-end, the goal is simply to make your space feel like yours. You don’t need to wait for the perfect moment or the perfect supplies to stop staring at those empty walls. Just grab what you have, embrace the mess, and remember that progress is better than perfection every single time.
I know that “adulting” often feels like a never-ending to-do list, but try to view these little projects as a way to reclaim your environment rather than another chore. Your home should be your sanctuary, not a source of stress. So, take a breath, pick a project that feels manageable, and just start small. You’ve totally got this, and honestly, your future self—the one sitting in a room that actually feels cozy and curated—will definitely thank you.
Frequently Asked Questions
I love the ideas, but how do I actually hang these things without ruining my apartment walls or losing my security deposit?
The “landlord special” is real, and I am not about to let my security deposit go down the drain over a heavy frame. If you’re in a rental, skip the hammer. Command strips are your best friend, but pro tip: clean the wall with rubbing alcohol first so they actually stay. For heavier pieces, look into monkey hooks—they leave tiny holes that are basically invisible once you patch them with a bit of spackle.
What should I do if I start a project and realize halfway through that it looks more "cluttered dorm room" than "aesthetic minimalist"?
First, take a breath—we’ve all been there. When the “aesthetic” turns into chaos, the best move is to aggressively edit. Pull everything off the wall and start with a blank slate. Instead of adding more, try the “Rule of Three”: group items in odd numbers and leave plenty of negative space. If it feels cluttered, it’s usually because there’s too much competing for attention. Less is almost always more.

